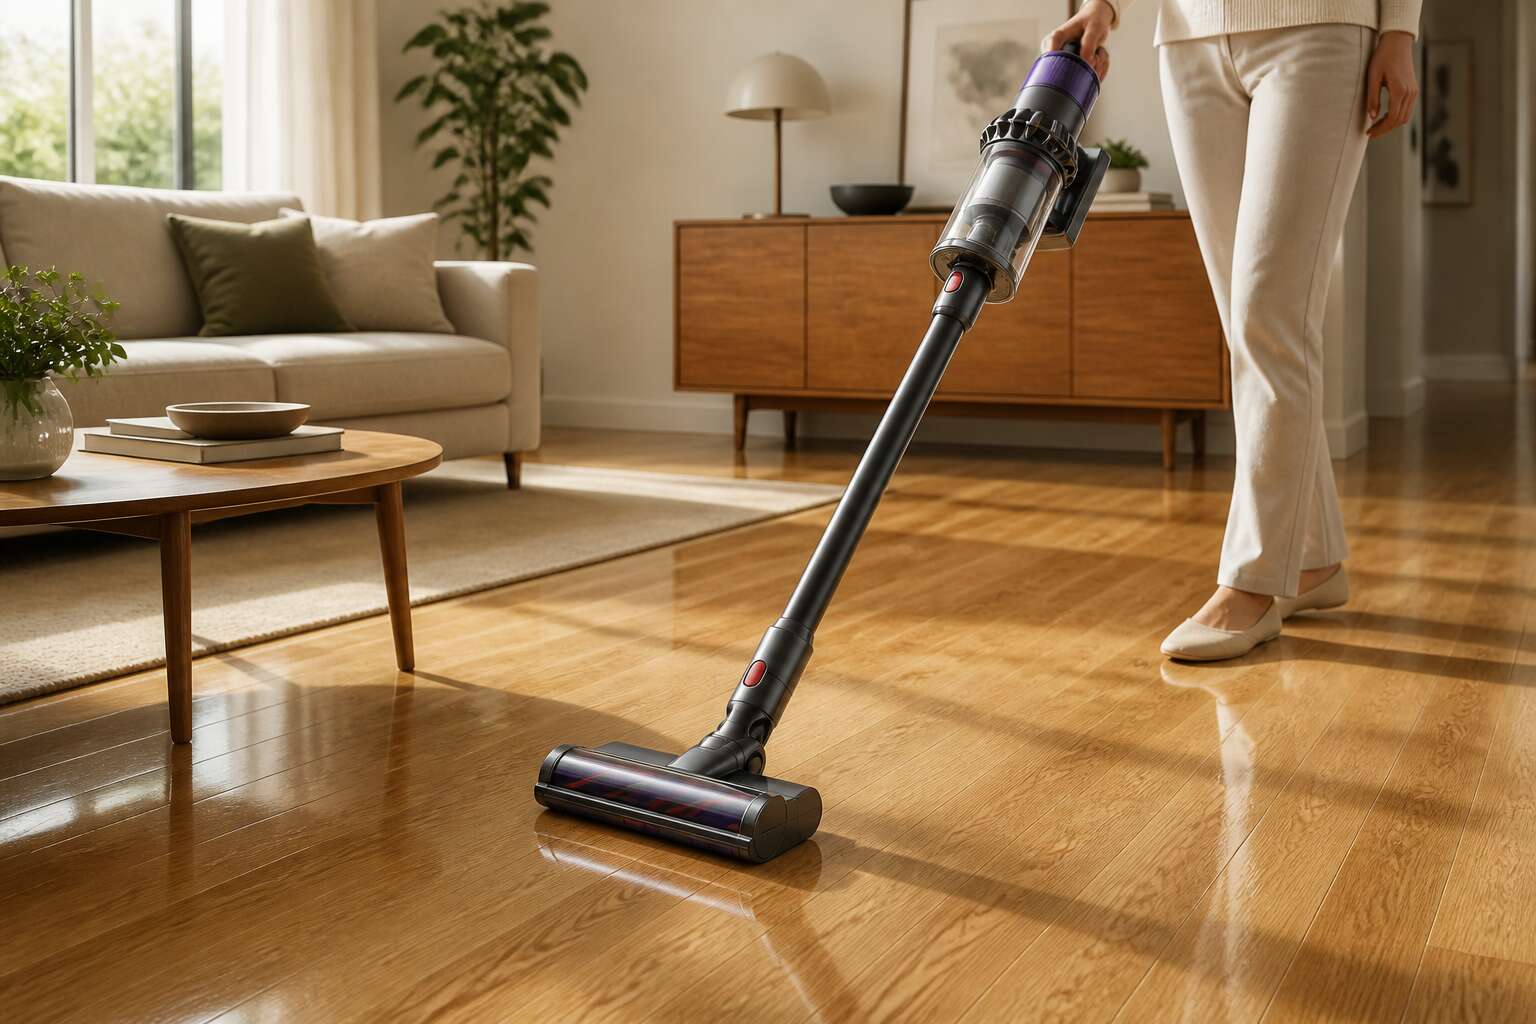
Choosing the Right Vacuum for Hardwood Surfaces
Suction Power vs. Surface Safety
Most vacuum manufacturers will happily sell you a machine with enough suction to pull a brick through a hose. That power is useless, and often harmful, when your surface is a delicate wooden floor. The trick lies in finding a balance between raw pulling force and the safety of the brush roll.
Consider what happens with a beater bar spinning at high speed. It is designed to agitate carpet fibres, but on a sealed timber surface, that same action can leave micro scratches. A high suction setting on a hard floor can also suck up grit and drag it across the finish, causing dull spots.
Instead, look for these features in your wooden floors vacuum:
- Adjustable suction settings
- A dedicated hard floor mode that stops the brush roll
- Soft bristle or felt strip attachments
The real mistake is assuming that more power always equals a cleaner home. For a wooden floors vacuum, the priority must be on controlled airflow and soft contact. You need enough suction to lift dust from the grooves between planks, but not so much that you fight the machine to push it forward. My own experience with an old, aggressive vacuum left a trail of fine scratches that only a costly polish could fix. Learn from that. Match the machine to the material, not to the marketing specs.
Soft Brush Roll Benefits
A single deep scratch on a wooden floor can cost more to repair than the machine that caused it. Choosing the right vacuum for hardwood surfaces starts with the brush roll. Soft brush rolls use gentle agitation to lift fine dust while avoiding the micro abrasions that stiff bristles leave behind.
In South African homes, where sand often travels from outdoors to timber floors, a soft brush roll also prevents debris from being thrown against skirting boards. The benefit is twofold: the surface stays intact, and the vacuum keeps moving smoothly.
- Soft brush rolls reduce noise on hard surfaces
- They reduce the chance of scattering grit into corners
- They prolong the life of the floor finish
For a wooden floors vacuum, the brush roll is the point of contact that decides whether your finish survives a decade or a single season.
Canister vs. Upright Models
Canister versus upright splits the cleaning world into two camps, and your wooden floors vacuum choice dictates which camp you live in. One wrong decision and you spend every weekend wrestling a machine that dislikes your home as much as you dislike dust.
A canister glides freely while the powerhead does the legwork. An upright keeps the motor close to your hands, which improves balance but adds weight. On engineered timber, your wooden floors vacuum needs to match the architecture of your space, especially the awkward 1.2 meter strip between your kitchen and lounge.
- Canister units fit into tighter storage spaces, like the gap beside your geyser.
- Upright models offer quick release for immediate use, no cord untangling ritual required.
South African homes with high thresholds and bulky door frames make the canister shine, while the upright suits open plan layouts. Whichever you pick, dust will still find the one corner you missed.
Cordless Options for Convenience
Most hardwood owners spend over an hour each week on floor care. A cordless wooden floors vacuum removes the tether entirely. I have yet to meet a homeowner who misses untangling a cord. You move from room to room without stopping to unplug and replug. The freedom feels immediate.
When choosing the right vacuum for hardwood surfaces, weight matters more than most buyers expect. A lightweight unit reduces arm fatigue during longer sessions. Battery life deserves equal attention. Swappable batteries, soft brush rolls, and balanced handles separate the useful models from the frustrating ones.
South African homes with high ceilings and wide passages benefit from cordless reach. The best wooden floors vacuum for your space is the one you actually pick up and use.
Preparing Your Timber Flooring Before Vacuuming
Clearing Debris and Obstacles
Fine grit and pebbles scratch timber when trapped under a vacuum’s wheels. In South Africa, homes open onto sandy patches or garden soil. This happens every day! Before operating any wooden floors vacuum, the surface must be clear.
Start with the obvious. Loose rugs, charger cables, and toys sit ready to clog a brush roll or scratch the boards. Remove them by hand. A vacuum should never be the first tool on a cluttered floor.
Hidden grit is trickier. Sweep or drag a dry microfiber cloth across the boards to lift abrasive particles. Check the corners and the gaps between planks. This is where fine sand accumulates and grinds into the finish.
Common culprits in South African homes:
- pebbles tracked in from driveways
- dried leaves blown through open doors
- pet claws carrying mud and grit
Once the timber is bare, the wooden floors vacuum works without dragging debris across it.
Inspecting for Damage or Loose Planks
In Cape Town, the drought heat and winter rains swell and shrink timber planks until they shift out of alignment with their neighbours. A wooden floors vacuum that ran smoothly in June may snag on a lifted edge by September.
I always run a hand across the boards before plugging in. Your palm finds what your eyes miss. Loose planks rock under pressure. Splits and gaps widen near doorways where morning light hits hardest.
The risks are real! A vacuum wheel catches a raised tongue and cracks the board. Water damage from a leaking geyser can leave planks soft and peeling. Check these areas:
- door thresholds where foot traffic compresses joinery
- room perimeters where skirting meets timber
- anywhere the finish appears dull or cloudy
Loose planks need fixing before a wooden floors vacuum passes over them, not after. Pressing down on suspect boards now saves a costly repair later.
Picking the Right Attachment
Preparing your timber floors before you even switch on the vacuum makes a significant difference. Dust and grit act like sandpaper under the machine’s wheels, so a quick sweep or a dry microfiber mop first removes the abrasive particles that scratch the finish. This simple step means your wooden floors vacuum doesn’t have to work as hard, and the unit’s brushes last longer. If you have rugs, shake them out or vacuum them separately to prevent debris from transferring back onto the timber.
Choosing the right attachment is about protecting the surface, not just cleaning it. Most machines come with a combination tool, but the design matters.
1. Use a brush attachment with soft, natural bristles. Synthetic bristles can feel stiff, and overly firm nylon can create micro-scratches on lacquered surfaces.
2. If your model has a felt strip or a felt-lined floor head, this is ideal. It glides smoothly and offers the best polish contact.
3. Avoid the beater bar or power head entirely. The rotating brush action is for carpets. On timber, it can scuff the wood and scatter fine dust into the air.
Suction control also plays a role here. A full-power setting on a bare floor creates a strong seal that can suck the brush head down hard against the boards, making it difficult to push. Lower the suction slightly. This allows the attachment to float over the surface, picking up debris while remaining gentle. If your machine has a floor selector switch, set it to the hard floor mode to open the valve and reduce the suction pressure. This prevents the wheels from leaving black marks and ensures the cleaning process is straightforward. When you use your wooden floors vacuum with these adjustments, you preserve the grain and the finish.
Effective Vacuuming Techniques for Wooden Interiors
Following the Grain Direction
A wooden floor wears its history in the grain. When you clean it, the direction of that grain matters. Run your wooden floors vacuum across the grain and you will notice the nozzle shuddering at every raised fibre. Follow the grain instead, and the same tool becomes quiet. The bristles ride the natural channels, lifting dirt from the deep seams where a broom never reaches.
In older homes, where planks have warped and settled unevenly, this technique becomes essential. The high and low spots create natural troughs for dust. A careful approach makes all the difference:
- Start at the far corner of the room and work toward the door.
- Push the wooden floors vacuum slowly along the length of each board.
- Overlap each stroke slightly to avoid missing the shallow valleys between planks.
The finish on your floor is thin but resilient; following the grain helps it stay that way.
Using Overlapping Passes
The silent accumulation of fine grit on hardwood is a relentless adversary. That abrasive layer, invisible until the light catches it just so, is what dulls a polyurethane finish over time. A standard sweeping motion merely relocates the problem. The true craft of maintaining a wooden floors vacuum routine involves reading the surface like a map, understanding that each plank possesses a directional flow.
Grain is the map, and your vacuum should travel along its lines, never against them. Pushing the tool parallel to the boards allows the bristles to glide into the minute grooves where embedded soil takes refuge. Going against the grain forces the roller to hammer against the raised fibers, creating micro-scratches that cloud the finish over years.
To complete the task properly, adopt a methodical grid. This involves moving the appliance in straight, overlapping lanes that mimic the layout of the deck.
– Begin at the farthest corner, nearest to the skirting board.
– Push the head forward in a slow, deliberate line toward the opposite wall.
– Overlap each subsequent pass by half the width of the nozzle.
– Pull the vacuum back gently along the same line to capture any loosened grit.
This overlapping pass is the cornerstone of a thorough clean. It ensures that the suction lingers long enough to lift the deep dirt, rather than just skimming the surface. Rushing through a room with rapid, zigzag movements leaves a film of fine dust behind, a film that feels like sandpaper underfoot the next day.
It takes true patience to resist the urge to hurry. Yet, for those who adopt this slower, deliberate cadence, the reward is a floor that retains its mirror-like sheen for decades. The resistance is minimal, and the quiet hum of the motor becomes a meditative rhythm. This is not just maintenance; it is the preservation of the wood’s inner character, ensuring the grain remains a beautiful, tactile feature of the home rather than a casualty of daily life.
Edge and Corner Precision
Edge and Corner Precision Without the Guesswork
A beautiful sweep across the open expanse of a room is only half the battle. The true test of any wooden floors vacuum routine happens where the walls meet the floor, in those tight recesses where baseboards cast their shadows. It is a simple fact of domestic life: dust and debris are cowardly, seeking refuge in the geometric corners of your home where a wide cleaning head simply cannot reach.
You cannot rely on sheer force to coax the grime from these pockets. Forcing a bulky machine into a narrow gap risks scuffing the very varnish you are trying to protect. Instead, precision requires the right arsenal at your disposal. When attacking these perimeters, consider your approach carefully.
– Switch to a crevice tool, slimming your profile to slide neatly along the skirting.
– Use a soft dusting brush for the baseboards themselves, preventing scratches while dislodging the film.
– Pause the brush roll if your machine allows it, focusing purely on suction power.
The technique is as important as the tool. Do not jab at the corner with frantic, short motions. Instead, guide the nozzle with a slow, deliberate glide, allowing the airflow to pull the dirt out of the junction rather than pushing it deeper into the crack. You are aiming for a clean line, a crisp transition from the vertical plane of the wall to the horizontal plane of the floor.
After you have attended to the edges, take a single, gentle pass with your main floor head along the boundary. This picks up any stragglers you might have dislodged from their hiding spots. It is this final, meticulous touch that elevates a standard cleaning session into a true craft. The result is a finish that looks intentional, where the corners gleam as brightly as the centre of the room, proving that the best wooden floors vacuum techniques are about finesse, not muscle.
Managing High-Traffic Zones
High-traffic zones test a wooden floors vacuum more than any other area. The constant shuffle of shoes, the drag of chair legs, and the grit carried in from the garden all converge on the same narrow path. The machine used here needs a deliberate rhythm, not a hurried one.
Start by assessing the traffic lane. In my experience, the area between the kitchen and the back door collects the most abrasive debris. This is where you should vacuum twice, once in each direction, to lift the grit that would otherwise grind into the finish.
- The vacuum works best along the length of the traffic path, not across it.
- A slower pace in these zones gives the suction time to capture fine dust.
- Lifting the head slightly at the threshold prevents dragging dirt over the transition strip.
The abrasion cycle repeats daily, and a wooden floors vacuum that handles this zone well will preserve the finish for years.
Adjusting Height Settings Properly
The previous focus on high-traffic zones reveals a truth about your floors: they are not a static surface, but a living record of daily passage. Yet, even the most careful routines falter if the tool fights the terrain. The fine art of adjusting the height settings on your wooden floors vacuum is where many well-intentioned efforts go to die.
It is a delicate balance. Set the brush roll too low, and you will hear the abrasive scrape of bristles against the urethane finish; a sound that should send a chill down any homeowner’s spine. This is not just noise. It is micro-scoring, the slow etching of hairline scratches that will eventually dull the sheen. On the other hand, a setting that is too high leaves the suction head hovering in a useless limbo. The vacuum becomes a mere air mover, gliding over the surface and leaving a fine film of dust and grit behind.
The correct setting is the one that allows the brush roll to just barely kiss the wood. You want the gentle whisper of contact, not the harsh grind of friction.
How do you find it? Look at the dials or sliders on your machine. Most have a range. Start with the highest setting for bare floors, and then lower it in small increments.
– Test on a patch of floor in an inconspicuous corner, like inside a closet.
– Push the vacuum forward. If it glides with a slight drag, that is close.
– Listen for the pitch. A high-pitched whine suggests too much suction and contact.
When you find the sweet spot, the machine will feel almost effortless to push. It will glide like a well-oiled machine, capturing the debris without punishing the planks. This is the silent pact you make with your flooring: the promise of thorough cleaning in exchange for the preservation of its lacquered soul. A well-adjusted wooden floors vacuum is not just a tool; it is a ritual of respect for the material beneath your feet.
Maintenance and Post-Vacuum Care for Parquet
Wiping to Remove Residual Dust
Vacuuming does the heavy lifting, but the final wipe decides if your parquet truly gleams or merely looks clean from across the room. After a meticulous pass with a quality wooden floors vacuum, a fine, almost invisible film of microparticulates often settles back onto the surface. This residue dulls the finish over time. A quick, dampened microfiber mop or cloth, wrung until barely moist, should be your last step. This captures the sleight of hand that suction misses.
The care routine extends to the tools you use for this finishing move. Never introduce excess water to the seams of the parquet, as this invites swelling and warping. Instead, treat the cloth as a dust magnet, not a mop. You should also consider the frequency of this task based on foot traffic and the presence of pets, which bring in finer grit that clings to the grain.
– Wipe in long, unbroken strokes, following the path of the floorboards.
– Flip the cloth to a fresh side when you see a visible line of collected dust.
– Rinse the cloth thoroughly after each room to prevent redistributing the grit.
Allow the floor to air dry completely before moving furniture back into place. This prevents water spots and ensures the protective seal stays intact. When you pair your machine with this mindful manual step, the longevity of the flooring improves dramatically. It also keeps the surface free of the abrasive particles that act like sandpaper underfoot. This routine closes the loop on the entire cleaning process.
Applying Suitable Polish or Conditioner
After the vacuum bag fills and the last strand of pet hair disappears, the parquet deserves restorative care. A suitable polish or conditioner does not mask the wood; it replenishes the oils lost to daily traffic. I have learned to read the label for the exact finish, because a wax meant for tung oil will ruin a polyurethane surface.
Application requires patience. Work in small squares, following the grain without doubling back. Let the product sit for the prescribed time, then buff to a dry surface. For those who prefer structure, here is the sequence that works for me:
- Test on a discreet corner and wait twenty-four hours.
- Apply using a lint-free cloth wrapped around a soft pad.
- Wait for the sheen to fade before walking on it.
This quarterly ritual, paired with a reliable wooden floors vacuum, keeps the grain supple and prevents the dullness from neglect. The floor stays resilient against Johannesburg’s dust and coastal humidity. Trust the product’s guidance, not imagination.
Scheduling Routine Deep Cleans
A parquet floor changes character as grit accumulates in its grain. Regular weekly cleaning removes surface debris, but deep cleans require a deliberate schedule. I set a reminder for the first week of each season, timed around Johannesburg’s dust season and the coastal humidity shifts. This cadence prevents the slow dulling that affects high-traffic homes.
- Clear the room of furniture and loose rugs before the session.
- Run a wooden floors vacuum on the bare floor attachment to lift embedded particles.
- Allow the wood to settle for an hour before any damp treatment.
Post-vacuum care centers on the machine itself. Empty the canister and clean the filter after every deep clean, because a clogged unit loses the suction needed for fine parquet grooves. The schedule turns maintenance into an automatic habit rather than an afterthought, keeping the floor’s surface stable through every season.
When to Restore or Refinish
A consistent care schedule protects the character of your parquet. A weekly pass with a wooden floors vacuum removes the abrasive dust that dulls the finish over time. This simple action prevents the buildup that leads to a permanent haze, which is a common issue in homes with heavy foot traffic.
After the main vacuuming, focus on the areas where grit hides. This includes the corners and the spaces under furniture. These spots often require a more deliberate approach, and using the right crevice tool makes all the difference.
Post-vacuum care is critical. It extends the life of both the flooring and your equipment. A clean machine operates at peak performance, ensuring that a wooden floors vacuum continues to protect the surface rather than just skimming it.
– Empty the dust canister after every session. A full bin reduces suction and strains the motor.
– Remove hair and fibers wrapped around the brush roll. This prevents damage to the roller and keeps the bristles effective.
– Wipe the wheels and housing with a dry cloth. This stops dirt from being tracked back onto the floor.
When the surface starts to look tired, a cleaning product designed for urethane finishes can help. Apply it sparingly with a microfiber mop, and always follow the manufacturer’s guidance. This restorative step, done occasionally, maintains the wood’s natural glow without causing buildup.
Common Pitfalls When Cleaning Wood Substrates
Avoiding Excessive Moisture
The persistent intruder is water, not grit. A dish of rain, a cloth wrung too loosely; these quiet agents seep into the seams of your planking. The wooden floors vacuum removes the surface dust, yet the true danger arrives after you set the tool down. Steam mops are a curse upon oak, forcing moisture deep into the substrate where it warps and lifts the finish like peeling skin.
- Never pair a steam mop with your wooden floors vacuum.
- Wring cloths until barely damp, not dripping.
- Address spills immediately, before moisture takes root.
Dry the surface with a soft towel after any wet pass. Let the water linger, and the boards will groan their betrayal. Moisture is the creeping shadow to keep at bay, or the heart of the house will swell with regret.
Steer Clear of Abrasive Tools
The vacuum is the hero of the room, but the tools you pair with it can be the villain. A wooden floors vacuum delivers the suction power needed to lift grit, yet the residue after a thorough pass is often tackled with the wrong instinct. Many homeowners reach for the scouring pad, the stiff bristle, or the edge of a metal scraper to loosen a stubborn spot of dried paint or tar. This is a gamble with your substrate.
The wood beneath your feet is resilient but scratched finish reflects light poorly. That dullness is the memory of every harsh stroke. Here is what to keep away from the surface:
1. Steel wool pads, which shed fragments that rust and embed.
2. Bristle brushes with stiff, ground-down fibers.
3. Putty knives or razor blades used without a plan.
4. Sandpaper of any grit, even as a dry touch-up.
The obsession with a spotless surface breeds a particular blindness. You see the imperfection, so you press harder with a coarse cloth. The wooden floors vacuum moves gently across the planks, but a single abrasive swipe can remove the protective layer that took years to age properly. The damage is physical, a sanding haze that dulls the grain. It is a quiet erosion of the floor’s character, traded for the illusion of cleanliness. The only safe scrape is a plastic or nylon edged tool, kept perfectly flush and used with deliberate, short motions. Any other method is a slow sacrifice of the wood itself.
Handling Stubborn Stains Safely
Sixty percent of refinishing jobs trace back to overzealous stain scrubbing. You spot a dark ring, grab the nearest cloth, and rub like you are polishing a trophy. That is a mistake. The wooden floors vacuum picks up loose grit, but a blotch needs chemistry, not brute force.
Consider these safe methods for stubborn marks:
- Use a damp microfiber cloth with a pH neutral wood cleaner.
- Let the cleaner sit for exactly ninety seconds.
- Blot with a dry cloth, never wipe.
- For oily marks, apply a tiny drop of dish soap diluted in water.
Each step avoids saturating the grain. The wooden floors vacuum remains for daily debris, but stains demand patience. You will save the finish and your sanity.
Vacuuming Frequency Recommendations
Somewhere between a dust bunny and a small gravel pit lies the truth about how often you should run your wooden floors vacuum. Frequency is not about a rigid schedule. It is a response to your home’s microclimate, your shoe habits, and whether a golden retriever uses your hallway as a runway. The pitfalls usually start with overzealous daily sessions using a beater bar, which can spall the finish over time. The opposite error is neglect, where grit acts like sandpaper underfoot.
A sensor-based approach works best. Consider your traffic zones. High traffic areas might need attention every other day, while unused guest rooms can go for two weeks. The goal is to capture debris before it embeds, not to polish the surface. Use these points as a baseline:
1. Daily pass using only a hard floor setting.
2. Every three days for a full-home sweep.
3. Weekly, a slow pass with the soft brush roll.
Longer intervals require a more deliberate pace. A hurried swipe with a wooden floors vacuum simply redistributes the fine particulate matter back into the air. Slow down, let the suction do the work, and you will find the right cadence for your substrate. Listening to the sound of the rollers is a simple way to gauge if you are forcing it.
Protecting Scratch-Prone Coatings
The most common missteps with a wooden floors vacuum are not about hardware failure but about habitual oversight. A machine is a tool; its effectiveness depends on the decisions made before the bristles ever touch the timber. Many homeowners assume that more suction is the answer to every embedded particle, yet a high-powered motor combined with a spinning beater bar is a recipe for surface degradation. The finish, though durable, is not invincible.
Consider the simple act of changing attachments. A crevice tool is not a substitute for a dedicated hard floor brush. Using the wrong tool tends to scatter fine dust into the air rather than trapping it in the bin. This is especially counterproductive in a country like South Africa, where open windows and seasonal winds invite a persistent layer of fine grit.
To protect your investment, there are several critical habits to establish:
– Empty the dust canister before it reaches the halfway mark; a full bin reduces airflow and forces the motor to work harder.
– Inspect the main brush roll for tangled hair or fibres after every third use; a clogged roll will not spin efficiently.
– Avoid using a powered brush head on delicate, hand-scraped planks; switch to a suction-only mode.
Beyond the mechanics of the device, consider the timing of your cleaning. A daily sweep with a dry microfiber mop is fine, but a full vacuum pass engages the wheels and the weight of the unit. Pushing a heavy canister model across a room with stubborn caster wheels can create friction marks. This is where the design of the unit matters. A lightweight stick model with soft rollers is often safer for daily maintenance, while a powerful canister might be reserved for a weekly deep clean.
The real damage occurs during the “quick tidy up.” We rush, we angle the nozzle incorrectly, and we drag the edge of the cleaner across the floor. The result is a series of fine scratches that only appear in the right light. The wooden floors vacuum you choose must be manoeuvrable enough to allow a slow, deliberate glide. If you find yourself wrestling with the wand or forcing the head under furniture, you are applying too much pressure. Let the machine’s weight do the work. The subtle art of vacuuming wood is in restraint: lower the noise, steady the pace, and observe the collection bin. When you see a reduction in the volume of dust, not an increase in the frequency of your passes, you have finally mastered the routine.
Dealing with Pet Hair and Dander
Pets impose a rhythm on the home, and the evidence of their presence settles into the grain of wooden floors. When you employ a wooden floors vacuum in a household with animals, the primary pitfall is not the fur itself, but the oily residue, or dander, that clings to the particles. Standard suction can lift the visible hair, yet dander often adheres to the finish. It requires a brush roll with softer, more pliable bristles to agitate the microscopic allergens without scraping the timber. A vacuum that fails to separate this residue will leave a dull film that attracts more dust.
Another frequent error is ignoring the secondary filter. The motor’s exhaust can blow fine allergens back onto the very surface you just cleaned. This becomes a cyclical problem where the floor never feels truly clean underfoot. To manage this effectively, you must commit to a maintenance schedule for the unit itself.
– Empty the dust cup immediately after every session with pets to prevent odour buildup.
– Wash the pre-motor filter monthly to maintain maximum airflow for fine particles.
– Check the base plate for cracks where hair can wrap around the axle.
The most overlooked element is the transition between rugs and timber. Pet hair is often matted into the rug’s edge, and dragging a beater bar from the carpet directly onto the wood risks jamming. Stop the brush roll, lift the head, and resume on the hard floor. This single habit preserves both the motor and the sealant. When the care routine focuses on the machine’s internal health, the wooden floors vacuum truly performs its part.


0 Comments