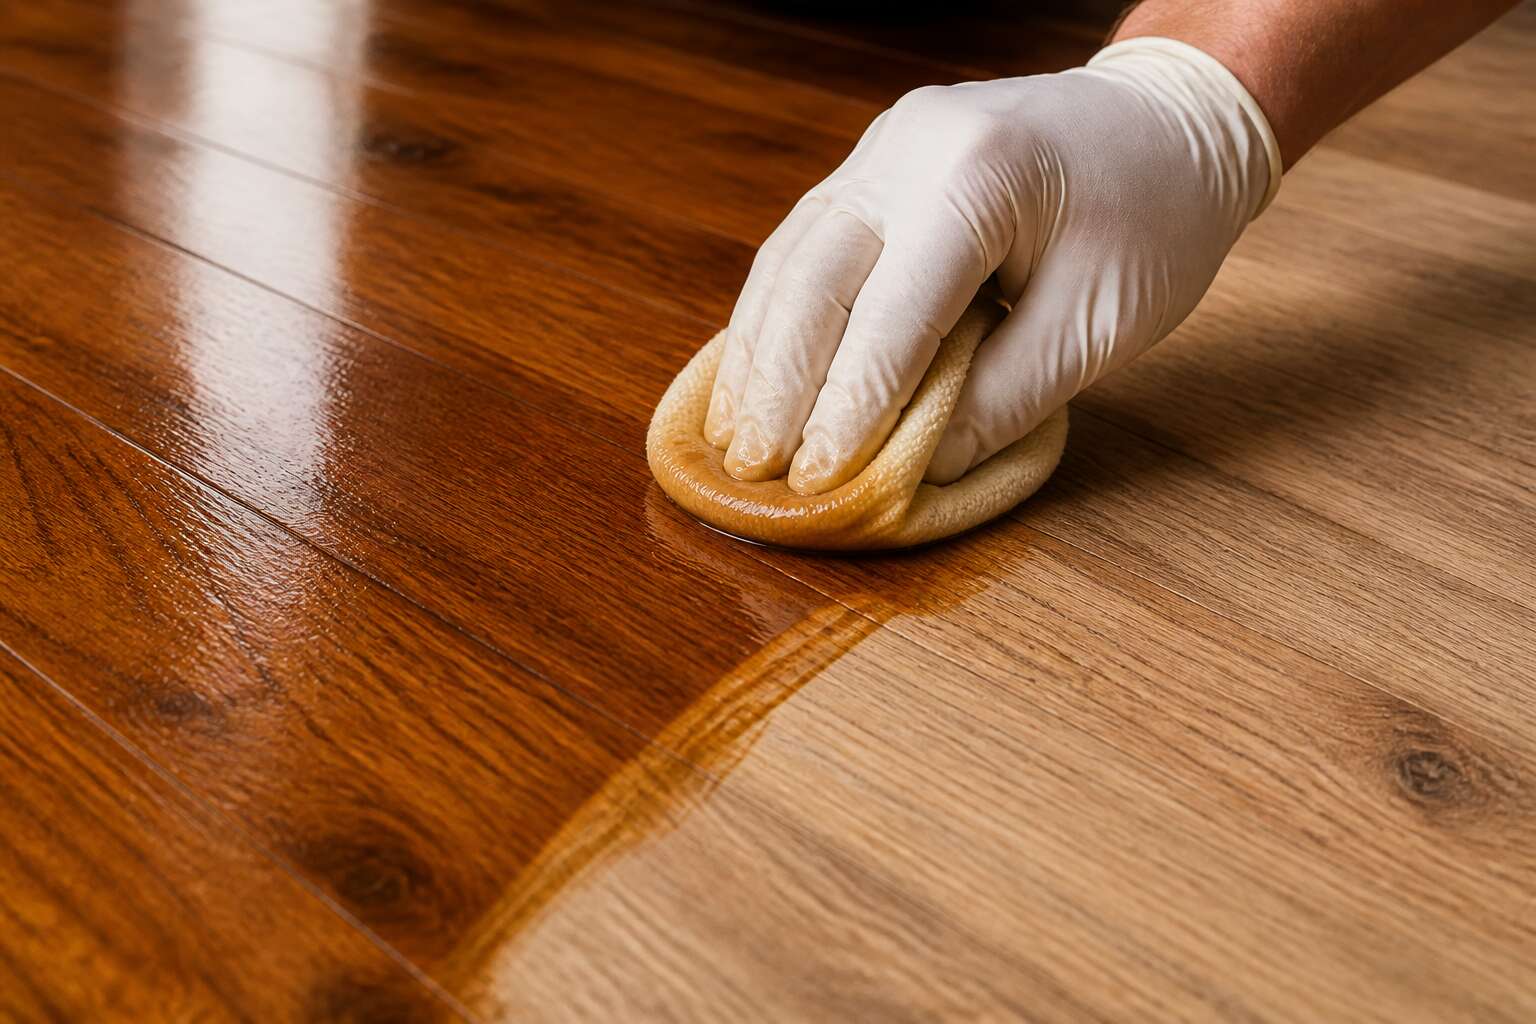
Understanding Floor Wax and Polish Basics
Difference Between Wax and Polish
Ask two floor enthusiasts in Durban to define wax and polish and you will receive three contradictory answers. Wax is a restorative treatment. It penetrates the grain, hardens, and forms a protective layer. Polish is a cosmetic. It sits on the surface, masks light scratches, and fades within weeks. A quality wooden floor wax polish performs the slow work of preservation. A polish performs the short-lived work of appearance.
- Wax builds with each application; polish evaporates.
- Wax requires buffing; polish requires only a cloth.
- Wax protects against moisture; polish protects against scrutiny.
In a climate of humidity and highveld dust, this distinction matters. Homeowners who grasp it rarely waste money on the wrong product. The difference changes how you read your floors entirely!
Benefits of Waxing Hardwood Floors
Waxing a wooden floor is an act of preservation, not decoration. The materials matter. Beeswax, carnauba, and mineral spirits form a semi-solid emulsion. This emulsion sits in the wood’s pores. It stabilizes the planks from within. Over time, wax builds a breathable barrier. This barrier lets wood exhale moisture vapour while blocking liquid water. In South Africa, where seasonal swelling is common, this balance prevents warping.
A consistent wax routine keeps the grain raised slightly, which softens footfall. It also reduces the noise of shifting boards. The financial benefit is clear. A waxed floor needs refinishing far less often. The surface remains supple, so minor impacts bounce off rather than dent. For homeowners who value longevity, wooden floor wax polish offers a quiet return. No gloss, no fuss. Just a floor that lasts decades. I have seen it happen. That is the reward!
Common Ingredients in Floor Wax Products
The chemistry of a fine wooden floor wax polish is more fascinating than most people realise. Carnauba, harvested from Brazilian palm leaves, offers a hardness that beeswax cannot match alone. I find that the best products blend these natural waxes with a solvent carrier, which allows the mixture to penetrate the timber rather than merely sit on top.
Mineral spirits act as the vehicle. They evaporate cleanly after application, leaving the protective solids behind. This is why the smell of a freshly waxed floor dissipates quickly, a sign that the solvent has done its work. Some manufacturers add synthetic polymers for extra durability, though purists often avoid them.
A few key ingredients define the character of any product:
1. Carnauba wax for a hard, glossy finish.
2. Beeswax for flexibility and a soft sheen.
3. Mineral spirits or turpentine as the solvent base.
4. Drying agents to accelerate the curing process.
5. Optional UV inhibitors to slow colour fading in sunny rooms.
Reading the label is the only way to know what you are buying. A high carnauba content means more buffing effort but a tougher result. A higher solvent ratio spreads easier but leaves less protection. The balance determines whether your wooden floor wax polish performs on the highveld’s dry winters or the coast’s humid summers. Knowing these basics transforms you from a passive user into someone who makes deliberate choices.
Signs Your Floor Needs Waxing
Your floor shows clear signs when its protective layer has worn thin. The first sign is water. A careless splash that once sat in perfect beads now spreads and darkens the grain! That darkening is your warning.
Patches begin to look dusty, even after vigorous sweeping. I have seen it happen in hallways and near kitchen thresholds. The sheen turns uneven, and fine scratches appear where no one remembers dragging furniture.
- Dull, cloudy patches that resist buffing.
- Water soaking into the wood instead of beading.
- A rough, furry feeling under bare feet.
These are the unmistakable calls for a wooden floor wax polish.
Preparing Wooden Floors for Wax Application
Cleaning and Degreasing the Surface
A dirty floor will fight off even the most expensive wooden floor wax polish, and you’ll blame the product when the real problem is your prep. In twenty years of restoring floors in Durban and Cape Town, I’ve watched homeowners waste good money this way. The surface must be free of oils, dirt, and old residue before any application begins.
Start by removing loose dust with a broom or vacuum. Then tackle the embedded grease, which collects in kitchens and hallways where shoes track in everyday grime. Warm water and a mild detergent will handle most of it. Stubborn patches need a proper wood cleaner.
- Wipe the boards with a damp cloth, not a soaking mop.
- Dry the surface immediately with a microfibre cloth.
- Run your hand across the wood to check for sticky residue.
Dry the floor thoroughly and leave it overnight. Any trapped moisture will cloud the finish and invite mould beneath the new wax.
Repairing Scratches and Dents
Scratches and dents are part of a floor’s history. In twenty years of restoring homes, I have learned that a blemish is not a flaw, but a record of daily life. Before any wooden floor wax polish is applied, those marks must be handled. A fresh coat of wax will not hide a dent. It will make it more visible.
The repair demands patience and a steady hand. Shallow scratches lift with a fine abrasive. Deep gouges require a filler that matches the grain. Dents from dropped pots or heavy furniture often respond to moisture and heat, as long as the timber remains sound. Sand each patch until it is flush. Then inspect your work from a low angle, because daylight exposes every inconsistency. A perfectly smooth surface allows the wooden floor wax polish to settle into an even sheen, and the finished floor keeps its history intact.
Choosing the Right Wax Applicator
Preparation decides whether a wax finish lasts a season or a decade. A floor that looks clean often hides a thin film of residue. That film will lift the new finish within months. The extra hour spent on preparation saves an afternoon of stripping later. After repairs are flush and sanded, wipe the entire surface with a tack cloth. Check for dull patches, because those indicate remaining oils. The timber must be bare and dry before any wooden floor wax polish touches it.
Choosing the right applicator depends on the floor’s size and your patience. A lambswool pad covers open areas well. A brush reaches corners and edges. For large rooms, a mechanical buffer saves time.
Here is what I keep in my kit:
- Lambswool applicator for broad passes
- Natural bristle brush for edges
- A clean cotton cloth for buffing
These tools allow the wooden floor wax polish to spread evenly without pooling.
Testing Wax Compatibility on a Small Area
Before committing to a full room, test the wooden floor wax polish on a discrete corner. This small act reveals how the timber responds. Some woods darken. Others reject the finish entirely, leaving blotches that require stripping.
I always choose a spot near the skirting board or inside a cupboard. Apply a thin layer of the wooden floor wax polish, let it dry, then inspect the sheen. Wait 48 hours if you can. This window shows whether the wax hardens properly or stays tacky beneath the surface.
- Check for discolouration after the first hour
- Scrape a coin across the test patch to verify adhesion
Temperature and humidity in Johannesburg or Cape Town affect drying times. A patch test accounts for these variables before you work across the entire floor.
Drying and Curing Considerations
Preparation runs deeper than surface cleaning. I find that the timber’s moisture content must sit between 8% and 12% before any wooden floor wax polish meets the grain. A moisture meter removes the guesswork. In Durban’s humidity, that reading takes longer to stabilise than on the Highveld.
Drying and curing are separate stages. Drying happens when solvents evaporate. Curing is the polymerisation that follows. Wait at least 72 hours before walking on the surface. The finish might feel dry to the touch, but the film remains soft underneath.
- Temperatures below 16°C retard the cure
- Underfloor heating draws moisture out unevenly
- Poor ventilation leaves solvent vapour trapped
Each coat of wooden floor wax polish needs its own cure cycle. Rushing the next layer traps solvent, creating a cloudy film that never fully hardens.
Step-by-Step Application Techniques
Applying Thin, Even Coats
Applying wooden floor wax polish in thin, even coats separates a durable finish from a sticky mess. Most people overapply, thinking more wax means more protection. That is false. A heavy coat takes longer to dry, attracts dust, and often peels. Work in sections instead.
Follow this order:
1. Dip the applicator lightly into the wax.
2. Spread it along the grain using steady, parallel strokes.
3. Overlap each stroke slightly to prevent gaps.
4. Wait for the first coat to cure before adding a second.
Thin coats let the product penetrate the wood and harden correctly. Two thin layers outperform one thick one. Let each layer cure properly.
Working in Sections for Consistency
Working in deliberate sections transforms how wooden floor wax polish settles into the grain. Start at the corner farthest from the door so you never back yourself into a finished area. Mark off one square metre using board seams or a nearby wall as a guide. Finish that zone completely before moving forward.
Here is the motion that keeps things consistent:
– Load the applicator lightly, then sweep across the length of the zone.
– Pull the wax toward you in steady, parallel strokes.
– Overlap each pass by half the applicator’s width.
Work your way across the room, section by section. When you stop for a break, stop at a boundary. This habit prevents hazy lap marks and uneven sheen. Board tones will catch light evenly, and your wooden floor wax polish will reveal a uniform glow across the entire room. The discipline of sectioned application, rather than a single ambitious sweep, produces a result worth the extra care.
Buffing Between Coats
Floor finishers have a saying: the finish is only as good as the surface it lands on. After a coat of wax dries, dust nibs, hairline debris, and raised grain create a fragile layer. Applying another coat without buffing makes those imperfections permanent.
Buffing between coats with a fine abrasive pad or a mesh screen removes the high points without cutting into the body of the wax. I keep the buffer on a low speed and rely on the pad’s texture. The surface gets a uniform tooth, which gives the next layer something to grip. Your wooden floor wax polish sets evenly and resists peeling, even in high-traffic rooms.
Dealing with Drips and Streaks
Drips are the enemy of a clean finish. A single runnel of excess wax catches light differently than the surrounding film, and once cured, it remains a permanent ridge. Catching drips while wet makes all the difference!
When I spot a drip along a skirting board or between plank seams, I stop and lift the bead with a lint-free cloth. Wiping pushes excess deeper into the grain, creating a cloudy patch. Streaking comes from overworking. The more you pad a section after it begins to set, the more you drag the film into uneven lines.
These habits keep that failure mode from appearing:
- A separate cloth sits in my off hand while I work
- I check each section from a low angle
- I lay down the wooden floor wax polish and step away
The wooden floor wax polish stays where it belongs, and the final surface reads as one continuous film.
Layering for a High-Gloss Finish
High gloss is not a single coat. It is a laminated stack of cured films, each layer adding its own clarity to the total. I start with a base coat of wooden floor wax polish and let it harden completely. Then I follow a strict sequence:
- Buff the cured base to a flat sheen.
- Lay down the next coat in long, straight strokes.
- Wait, buff, and repeat until the surface reflects a defined edge.
The third layer is where the mirror appears. Each subsequent coat must be thinner than the last, otherwise the underlayers soften and ripple. The final buff brings the top film to a high gloss. That is the last act, one that cannot be rushed.
Safety and Ventilation Tips
Applying this polish demands a methodical body. I begin at the farthest wall, working backward to the exit. Each brush stroke crosses the previous line by a third, which builds an even film without puddling. The room stays quiet and contained.
Ventilation is not a suggestion! I open every window and set a fan to push the vapour outside. Solvent fumes can accumulate in a sealed space. I wear a respirator rated for organic vapours. My safety sequence:
- Inspect airflow before opening the can.
- Pour a small amount into a tray, never directly on the floor.
- Work for twenty minutes, then pause for fresh air.
These steps protect your lungs and your judgment. A clear head applies wooden floor wax polish better than a hurried hand.
Maintenance and Long-Term Care
Daily Cleaning Routines for Waxed Floors
Daily care for a waxed floor is a study in restraint. One might assume a vigorous sweep with a household broom qualifies as maintenance, but that is how micro scratches are born. Instead, a soft dust mop captures the day’s debris without disturbing the wooden floor wax polish underneath.
In my own experience, the evening routine involves a few unglamorous tasks:
- Remove shoes at the door, because gravel is not a texture.
- Run the dust mop over high traffic zones, focusing on where life actually happens.
- Resist the urge to use water, unless a milky haze feels intentional.
Water is the enemy of a cured wax film. Weekly, a dry microfiber pad on a flat mop handles the corners that the dust mop misses. For stubborn spots, a damp cloth, never a wet one, does the job without ruining your finish.
Reapplication Schedules and Spot Repairs
A waxed floor’s lifespan is measured in footsteps, not years. The entrance hall demands reapplication long before the guest bedroom ever does. I check traffic zones quarterly, looking for dull patches that signal worn film. For most homes, a fresh application of wooden floor wax polish every six months keeps things balanced. Spot repairs interrupt that cycle. A single cup ring or scuff shouldn’t force a whole floor treatment. Focus on the damaged area instead:
- Clean the spot with a damp cloth and let it evaporate completely.
- Apply a thin layer of wooden floor wax polish, feathering the edges.
- Allow it to dry and then buff until the patch blends.
If the film looks thin, repeat once more. This targeted approach delays the next full reapplication and preserves the floor’s natural character. The schedule is a guide, not a rule; your eyes should have the final say.
Using Rugs and Pads to Protect Waxed Surfaces
The quiet tragedy of a hardwood floor is that its most beautiful moments often occur underfoot, unseen. A dropped utensil or a dragged chair leg can etch a permanent scar into the film, a reminder that traffic is the enemy of luster. Rugs act as a buffer, a deliberate barrier between the world’s grit and the wood’s delicate surface. They absorb the relentless abrading of everyday life, preserving the sheen without demanding constant intervention.
Strategic placement is key, not random decoration. Consider the geography of your home and where the footfall is heaviest. Place rugs at entry points, but ensure they are thin enough to allow doors to swing freely. Do not forget the silent damage of furniture. Felt pads under table legs and sofa feet are the unsung heroes; they distribute weight and prevent the compression that leaves permanent dents.
Here is a checklist for effective protection:
– Use a rug with a breathable backing to prevent moisture entrapment.
– Choose pads with a natural rubber or felt composition, never PVC.
– Inspect the underside of rugs regularly for trapped debris.
– Vacuum the rugs themselves to prevent grit from migrating to the floor.
The interaction between a rug and a waxed finish is a study in friction management. The wax layer remains vulnerable to the microscopic particles carried in on shoes, and a rug’s weave can act as a trap, holding those particles away from the surface. This is not about hiding the floor, but about buying time for the wooden floor wax polish to do its quiet work. The film is alive, and it breathes better when shielded from the harsh exhalations of an active household. Regular rug care is a direct investment in the wax’s longevity, a practice that wards off the need for a full reapplication.
Avoiding Common Damaging Chemicals
The most insidious threat to a waxed floor arrives in a bottle labeled “all-purpose cleaner.” Ammonia, vinegar, and citrus-based degreasers strip the very film that wooden floor wax polish builds. A single misguided wipe can cloud months of careful layering.
South African households often reach for multipurpose sprays, but these contain solvents that soften wax. The result is a tacky surface that collects dust. Water-based cleaners are equally culpable when used excessively. They swell the wood fibers and dull the finish.
Here is what to avoid:
- Ammonia-based glass and surface cleaners
- Vinegar solutions, despite their popularity as natural remedies
- Steam mops, which force moisture into the wax layer
- Oil soaps that leave a sticky residue
Read labels with the same care as food ingredients. If a product lists glycol ether or sodium hydroxide, it belongs in the garage, not on your floor. Trust me, your wooden floor wax polish deserves better than guesswork.
Troubleshooting and Expert Recommendations
Fixing Cloudy or Dull Patches
Cloudy patches on a floor can be a sign of trouble. I have seen them spread across otherwise flawless surfaces. They often stem from residual moisture beneath the wooden floor wax polish, or from applying a new coat before the old one has cured. The result is a milky haze that dulls your reflection.
Begin by testing the affected area with a dry microfibre cloth. If the cloudiness lifts, it is merely surface residue. If it persists, the problem sits deeper. My expert recommendation is to act gently, never stripping the entire floor.
- Ventilate the room for several hours to draw out trapped dampness.
- Apply a fresh, whisper thin layer of wooden floor wax polish over the patch.
- Buff with a soft cloth using small, circular motions.
These steps restore clarity without harming the finish. Patience is worth more than harsh solvents.
Removing Built-Up Wax Layers
What happens when a floor receives too many coats? Layers of wooden floor wax polish accumulate until they harden into a crust. I have seen oak floors where old coats turned amber and opaque, hiding the grain entirely. The remedy is removal, not another layer.
A commercial wax solvent, tested on an inconspicuous corner, will soften the oldest strata within minutes. Work with a plastic scraper, never steel. Lift the dissolved residue toward you in a single, continuous motion. Rubbing back and forth will only redeposit what you intend to lift.
- Treat one square metre at a time
- Wipe each section before the solvent evaporates
- Let the bare timber rest overnight
Only then should fresh wooden floor wax polish be introduced. Coastal KwaZulu-Natal can extend the resting period, while a dry Highveld winter can shorten it.
When to Hire a Professional Floor Restorer
When the grain of your wooden floor wax polish has vanished beneath an opaque residue, you may be beyond the reach of solvent. I recall a Pietermaritzburg home where ten years of overcoating had fused with the timber’s natural oils. No chemical could reverse that bond. Damage of this kind runs deeper than the surface.
Professional restorers bring drum sanders, edgers, and moisture meters that most homeowners never touch. They read the wood’s moisture content before recommending any course of action. Sanding in the wrong direction permanently scars the plank!
- Cupping or crowning across the boards
- Blackened patches after solvent application
- Wax that never hardens, even after 48 hours
These signs point to subfloor moisture or a compromised finish, not a simple reapplication problem. When you see them, the cost of professional restoration is lower than the cost of replacing wooden floor wax polish. That is the quiet arithmetic of restoration.
Eco-Friendly and Natural Wax Alternatives
Nearly 60% of South African homeowners who switch to natural wax never return to solvent-based products. That shift demands a different approach. Carnauba and beeswax blends behave differently from their chemical cousins. A common mistake is applying them too thickly. Carnauba requires heat to bond properly, while beeswax needs a thinner, cooler application. When troubleshooting problems with natural wax, check the room temperature first. Cold environments cause streaking regardless of product quality.
Consider these expert recommendations:
- Use a microfibre applicator for natural waxes.
- Test on an inconspicuous corner before treating the full floor.
- Allow 72 hours before placing rugs back.
Your wooden floor wax polish should be matched to the timber species. Hardwoods like Rhodesian teak respond well to polymer blends, while softer pines suit pure beeswax. Overbuying expensive eco-wax for the wrong wood type is a waste. Read the technical data sheet before purchasing. The right wooden floor wax polish application saves money and spares the environment.
Comparing Paste Wax vs. Liquid Polish
Paste wax and liquid polish are not interchangeable siblings. They behave differently, fail differently, and demand their own troubleshooting routines. Paste wax builds a thicker layer that forgives heavy foot traffic. Liquid polish dries fast and leaves a lighter finish, but it reveals every application mistake with brutal honesty.
Troubleshooting starts by comparing what the label promised with what your timber delivered. A classic failure is applying a hardwood paste wax to soft pine. The wood absorbs the product unevenly, leaving blotches that no amount of buffing will rescue.
- Paste wax suits hardwoods and high traffic zones.
- Liquid polish works for quick refreshes on lightly worn floors.
- Matching product to wood species prevents most headaches.
Experts agree that the best wooden floor wax polish is the one you will actually reapply on schedule. The right wooden floor wax polish balances protection with patience. Save the paste wax for weekend projects and let liquid polish handle the weekday rush.

0 Comments