Understanding Wood Floor Finishing
Why Finish Matters
When the drum sander stops, the timber is still bare. Moisture seeps into the pores, the sun drains the natural tone, and a heavy foot leaves its own trace. I have seen a floor fail from the top down because the coating was treated as an afterthought. A wooden floor finish is the working layer of every board. It carries the load, diverts the heat, and concedes nothing to the daylight.
In coastal humidity or the dry Highveld, the floor must behave differently. The finish that holds the grain steady is the one matched to the season it lives in.
The assignments of a wooden floor finish, in order of quiet importance:
- Prevent moisture from lifting the planks.
- Slow the colour change under sunlight.
- Offer a wipeable surface for each room.
That thin film is nearly invisible, but it keeps the whole room in place. It deserves every minute of your attention before the dust settles.
Water-Based vs Oil-Based
Most people assume the choice between water and oil is about gloss. It is actually about how the floor ages. A water-based wooden floor finish sits on the surface, hard and clear, while an oil-based finish sinks into the grain and becomes part of the board itself.
In South Africa, the climate dictates the sensible option. Water-based coatings handle the Highveld’s UV exposure with less yellowing. Oil finishes suit coastal homes where humidity demands a breathable layer. Each has a distinct personality:
- Water-based: fast drying, low odour, maintains the timber’s original tone
- Oil-based: rich amber depth, easier spot repairs, a slower working time
The true difference reveals itself after a few years of foot traffic. A water-based wooden floor finish wears in layers, needing a full recoat when scratched. The oil route wears gradually, allowing subtle renewal over time.
Durability and Aesthetics
The floor remembers every barefoot morning and every dropped teaspoon. Durability is not a lab rating, it is the quiet conversation between your daily life and the timber beneath you. A robust wooden floor finish does not merely protect, it negotiates with the elements, from the Highveld sun to coastal humidity.
Aesthetics operate on their own timeline. The surface sheen is only the first impression, the true character emerges in the patina that develops where you walk most. The grain deepens, the colour warms, and the finish either accentuates this evolution or masks it.
Consider what you value in your space:
- The crisp, unchanged colour of a matte, modern interior
- The tactile warmth of a low sheen that reflects light softly
- The natural grain texture that feels raw underfoot
The longevity of your wooden floor finish depends on this alignment between your aesthetic preference and the physical demands of your home. A finish that suits your lifestyle will age with dignity. One that fights it will show every scuff. The right choice is a partnership, where the floor’s endurance and your visual delight are the same story.
Popular Finish Types
Polyurethane
Polyurethane remains the undisputed workhorse of the wooden floor finish market. It forms a robust plastic-like shield over the timber, resisting scratches and spills with startling efficiency. For homeowners, this means less fussing over every dropped fork or stray pet claw.
The finish excels in its clarity. While oiled floors can dull the natural grain, polyurethane offers a glassy transparency that highlights the wood’s unique character. It bonds tightly to the surface, creating a seamless barrier that does not peel or flake.
For those tackling a project, the application dictates the result.
– Work in well-ventilated areas.
– Use a high-quality lambswool applicator for even spreading.
– Apply thin, consistent coats.
– Allow ample drying time between coats.
You will find that this finish provides a harder surface than many alternatives. It is an ideal choice for high-traffic zones in your home, giving you peace of mind without demanding excessive maintenance. There is a reason it dominates the local supply stores.
Shellac
Shellac offers a different temperament entirely. This natural resin, secreted by the lac beetle, brings warmth that synthetic coatings rarely match. It dissolves in alcohol, which sets it apart from the harder finishes at your local store. For heritage homes in Cape Town or Johannesburg, shellac remains a preferred choice for period-correct restoration.
The material has a forgiving nature. Minor scratches can be repaired by re-applying fresh shellac, which melts into the existing surface. This simple process extends the life of the finish without a full sand.
Water is the enemy of shellac. Prolonged exposure leaves white rings, so plan to use it away from kitchens and bathrooms. It works best on interior joinery, furniture, and low-traffic wood floors. Choosing shellac as your wooden floor finish demands trust in natural origins rather than synthetic strength. The trade-off is a surface with genuine character, one that develops a rich patina over time.
Lacquer
Lacquer dries with a hardness that feels almost ceramic underfoot. Unlike polyurethane, which forms a thick film, lacquer bonds in thin layers that fuse with the grain. This is why many restoration professionals in South Africa choose it for intricate parquet patterns.
Here is the catch. Lacquer demands rapid application. The solvent evaporates within minutes, so you work in overlapping strokes. One wrong pause leaves a visible lap mark. I have seen novice applicators curse this finish.
What makes lacquer remarkable is its repairability. A scuffed area can be dissolved with fresh solvent and blended seamlessly. That keeps a wooden floor finish looking pristine for years without resanding.
- High gloss potential
- Low moisture resistance
- Quick drying time
Penetrating Oils
Penetrating oils work differently. They soak into the timber instead of sitting on top. The wood absorbs the oil, and the finish becomes part of the material itself. This keeps the surface feeling warm and natural, which many homeowners in South Africa prefer for solid oak and pine floors.
The result is not a plastic shell. Scratches and wear appear on the wood itself, not on a coating. That honesty has a downside. Penetrating oils need maintenance, usually every year or two, depending on foot traffic. There is no way around it.
- Moisture protection is moderate, not absolute.
- Repair work is local, you sand a spot and reapply oil.
- Colour deepens the grain without hiding it.
If you want a wooden floor finish that shows the timber’s character and ages gracefully, penetrating oils deserve attention.
Application Techniques
Preparing the Surface
There is a moment before application when the floor looks raw and vulnerable. That moment decides everything. Proper surface preparation connects the timber to the wooden floor finish that will seal it. I have seen products fail because the surface betrayed them.
The main problem is always residue. Old wax, grease, or fine dust from sanding creates a barrier no coating can penetrate. Start by removing all existing layers. Evaluate the substrate!
- Check moisture content; anything above 12% invites peeling.
- Sand with finer grits, ending at 120 or 150.
- Vacuum thoroughly, then wipe with a tack cloth.
South African humidity makes this step non negotiable. Skip it and your wooden floor finish will lift within months. I watched a contractor rush through sanding; the finish bubbled because moisture trapped beneath had to escape. Preparation is the only part you cannot see later, and the only part you will inevitably feel.
Brushing and Rolling
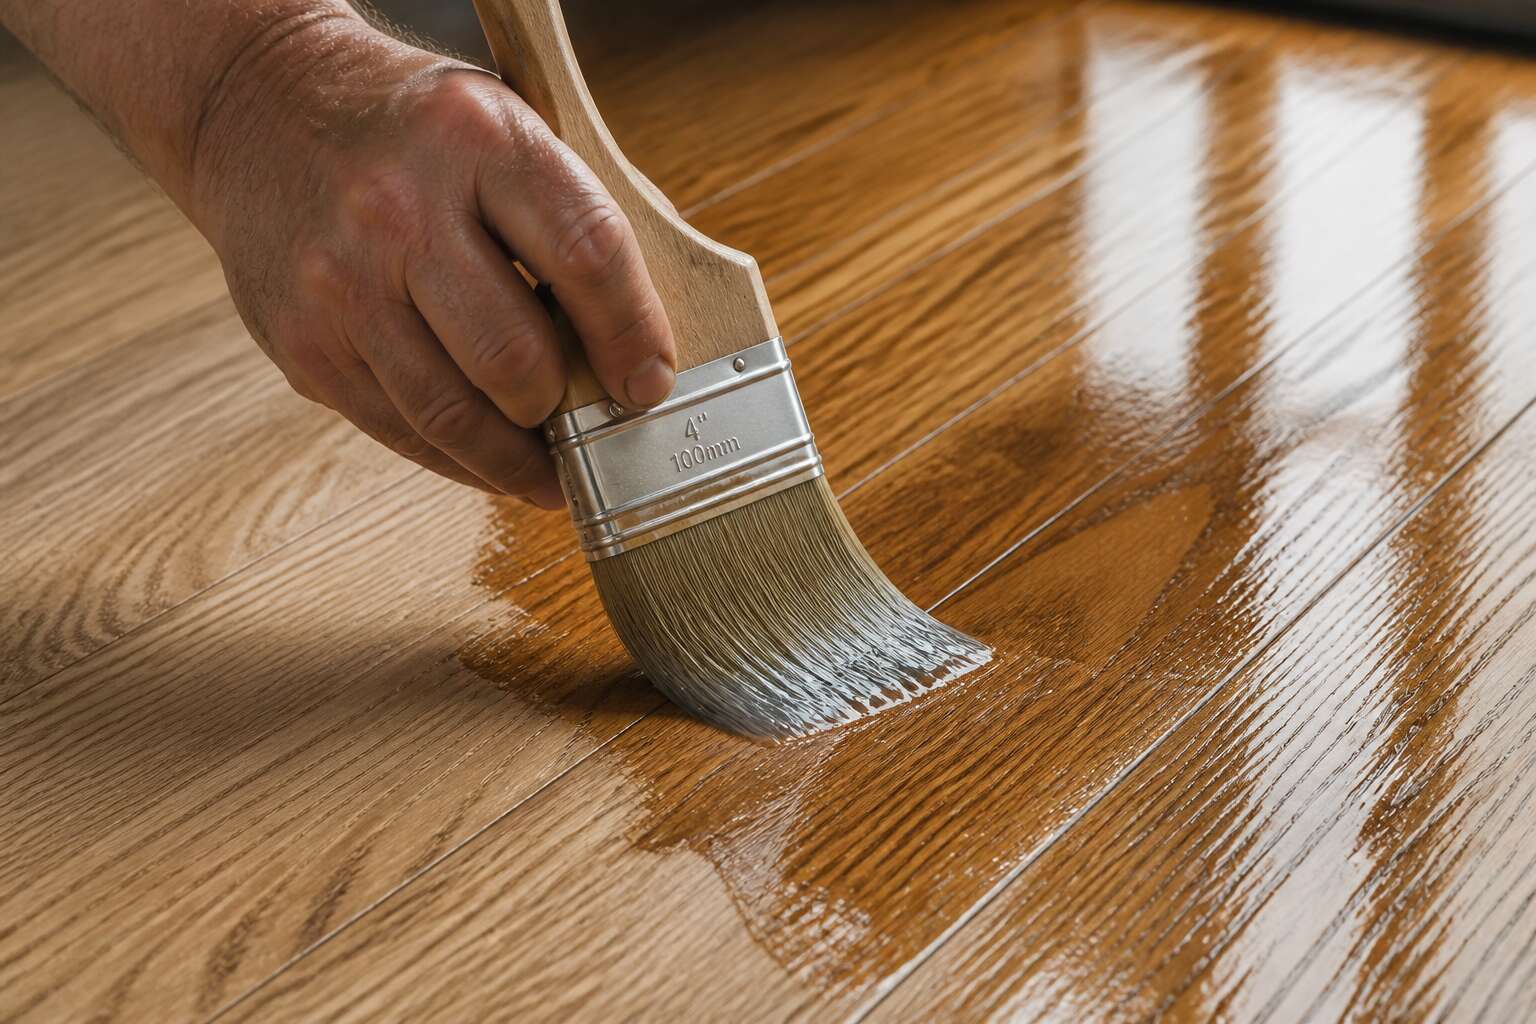
Brushing and rolling separates the composed from the careless. The wooden floor finish goes on thick and wet, and how you wield that brush determines the final look. A good brush holds enough coating for one smooth pass. A bad brush sheds bristles into the finish, and you will pick them out for hours.
Work in manageable sections. Keep a wet edge so overlaps melt together.
- Cut in along the walls with the brush.
- Roll the open area in long, even strokes.
- Tip off over the rolled surface while it is still wet.
South African heat accelerates drying. The coating skins over fast, and a second pass over a dry edge leaves ridges. Use a synthetic brush for water based products and natural bristle for solvent based ones.
Spraying
Every experienced applicator knows the silent panic of a sprayer clogging mid pass. It happens in the middle of an open stretch, where the film looks uniform until you get close. Spraying a wooden floor finish is a different relationship between the operator, the machine, and the material. Unlike brushing, spraying offers no tactile feedback. You read the surface by its reflection. The wet floor glows. Dry spots stay dull. In South African heat, you have minutes before the surface starts to skin. I have seen this heat ruin more than one perfect setup.
Three variables determine the outcome:
- Viscosity of the material
- Pressure in the line
- Distance from the nozzle
Get any of these wrong and your wooden floor finish goes uneven. A clean pass feels effortless, but that effortlessness is earned through preparation.
Staining and Sealing
Staining is where the floor’s character shows up. The same plank can absorb two different shades depending on its cellular density, which is why a single batch of wooden floor finish can look mottled if applied carelessly. Tannins in South African hardwood respond unpredictably to certain pigment loads, so test boards are non-negotiable.
Sealing demands its own patience. The stain must cure completely before any sealer touches the surface. Trapped moisture creates a white blush that gets blamed on the product, never the rushed schedule.
A few hard-earned observations:
- Working against the light when applying stain prevents missed sections.
- Lap marks appear after fifteen minutes and become permanent once sealed.
- Porous wood accepts a sanding sealer before the final coat.
The final coat of wooden floor finish should level without reworking. If you push the sealer around too much, you introduce bubbles. Let the film settle itself.
Curing Time
Curing time is the part of the trade where patience meets physics. The drying schedule printed on the container is a suggestion, not a contract. Humidity in South Africa alters the window significantly, and a wooden floor finish decides when it is ready, not the applicator.
The application technique matters less than what happens after the roller leaves the surface. The film demands stillness. I have watched experienced crews undo their own work by dragging extension cords across a floor that needed silence. Foot traffic, furniture placement, even the hum of a refrigerator compressor, all compromise the molecular bond during the first 48 hours.
- The first 24 hours establish surface hardness.
- The following six days build the full structural integrity.
Most failures occur when someone confuses touch-dry with cured. The wooden floor finish may feel solid by morning, yet still mark under a chair leg later that same evening.
Maintenance and Repair
Cleaning Methods
The average household tracks in nearly a kilogram of grit weekly. That grit abrades the wooden floor finish. A microfiber mop daily stops most damage. For deeper cleaning, mix a teaspoon of pH neutral soap into warm water. Wring the mop until barely damp. Excess moisture swells the boards.
When spills happen, act within minutes. Blot with a soft cloth, never rub. For stubborn spots like dried wine or gum, use this approach:
- Harden the spot with an ice pack.
- Gently chip it loose with a plastic scraper.
- Clean the residue with a cloth dampened in vinegar and water.
Repairing scratches is simpler than you think. Apply a matching tinted polish with a cotton swab. Let it dry for two hours. Your wooden floor finish will look restored without a full recoating.
Scratch Repair
Fine scratches appear within weeks of normal use, and they always surprise me! The wooden floor finish absorbs most of the damage, leaving the wood untouched beneath.
For shallow marks, use a tinted polish that matches the existing tone. Apply it with a cotton swab, let it dry for two hours, then buff with a soft cloth. The line disappears into the surrounding grain.
Deeper gouges require a different method:
- Press a matched crayon filler into the groove.
- Scrape off the excess with a plastic card.
- Seal the spot with a thin layer of clear finish.
This approach restores the wooden floor finish without sanding or recoating, and it holds up to everyday traffic.
Recoating vs Refinishing
I have watched homeowners recoating year after year, assuming they are preserving the wood. Recoating applies a fresh layer of wooden floor finish over the existing one, provided the current coat still adheres and the surface is thoroughly cleaned. Refinishing removes the old finish entirely through sanding or chemical stripping, then rebuilds the floor from bare wood. The distinction matters because each approach carries different costs and disruption.
The choice depends on the condition of the existing layer:
- Recoat when the old finish is intact, merely dull, or lightly scratched
- Refinish when the finish has worn through to the timber or water has stained the boards
If the floor has been recoated repeatedly, accumulated layers grow brittle. That stacked wooden floor finish will eventually fail, and sanding back to raw board becomes the only effective remedy.
Protective Measures
A floor fails in silence. Last month I inspected a Johannesburg home where a single chair leg had ground the same spot for three years. The damage ran deeper than the stain. It had breached the wooden floor finish and opened the grain to moisture.
Protective measures are unglamorous work:
- Felt pads under furniture legs
- Entry mats to capture sidewalk grit
- Area rugs across high-traffic routes
- Blinds drawn during peak UV hours
Each intervention reduces the abrasive load on your wooden floor finish. I have also watched hydrolysis attack a floor in Umhlanga because nobody checked the humidity, and I can tell you that the repair bill was substantial. The boards had absorbed moisture from the coastal air until they buckled at the seams. No amount of spot repair could save them. The entire stretch had to be redone at enormous cost.
Choosing the Right Finish
Traffic Levels
The volume of foot traffic is the primary factor in finish choice. A private bedroom might see a hundred steps a day, while a commercial entrance can host thousands. That difference determines how much wear your wooden floor finish will face. I have seen low sheen finishes fail within six months in a high traffic hallway. Conversely, a tough industrial grade coating on a seldom used guest room wastes money.
Traffic levels fall into three practical categories:
- Entryways and open plan kitchens require the hardest available options.
- Living rooms and dining areas tolerate medium durability.
- Bedrooms and studies accept softer finishes that are easier to repair.
The common mistake is assuming one perfect finish exists. Instead, match the right wooden floor finish to the measured flow of life through the room. That calculation, more than brand or price, determines whether your floor still looks presentable in five years.
Sheen Preferences
Most people choose a sheen level as an aesthetic afterthought. That is a mistake. Gloss levels are a functional property of the wooden floor finish, not just a stylistic preference. The glossier the surface, the more it reflects light, and the more clearly it reveals scratches, dust, and footprints. A high gloss floor in a sunny Cape Town lounge will demand constant buffing. It will show every mark within hours.
Your decision here impacts maintenance and longevity. Consider these sheen options:
– Gloss: High shine, high maintenance, prone to showing wear.
– Satin: Moderate shine, balances beauty with practical upkeep.
– Matte: Low reflection, masks scratches, suits busy households.
The trend towards matte finishes is not merely fashionable. It aligns with a practical reality for South African homes, where dust and grit are constant companions. A matte wooden floor finish hides the daily scuffs from kids, pets, and heavy furniture. Satin remains a solid compromise for dining rooms where you want elegance without the clinical glare of high gloss. The sheen level changes how the wood grain reads under light, affecting the room’s character far more than the colour of the stain. I have seen clients insist on a glossy finish for a rental property, and they regretted it within a year. The tenant complained, the scratches were visible, and the maintenance cost ate the deposit.
Do not let the sales showroom fool you. Those lighting displays are designed to make the wood look dramatic. Your hallway at 7am on a winter morning is the real test. Choose a sheen that will be your ally, not your tyrant. The right wooden floor finish should work with your lifestyle, not against it. That is the practical truth of the matter.
Eco-Friendly Options
South African homeowners increasingly ask what a wooden floor finish leaves behind in the air they breathe. Solvent heavy stains and sealers produce fumes that settle into carpets and upholstery.
Plant based oils and waxes offer a renewable route. They soak into the grain and allow moisture movement, unlike film forming finishes that trap vapour. Water based lacquers with low volatile organic compounds harden quickly and release minimal odour. Their durability approaches traditional options, though they may require more frequent recoating in high traffic areas.
- Tung oil, pressed from tree nuts, resists mild moisture
- Hardwax oil, a blend of natural oils and waxes, allows simple spot repairs
- Low VOC water based polyurethane, available in several sheens
Johannesburg’s dry winters and Durban’s humid summers punish any coating. A breathable oil finish flexes with the wood, reducing cracks. The ecological benefit of your chosen wooden floor finish shows in lower emissions and the long term health of the room.
Cost Considerations
The upfront price of a wooden floor finish rarely reflects the long term cost. A cheaper sealer might need recoating every eighteen months, while a more expensive option could last a decade. In South Africa, where the rand fluctuates against import currencies, locking in a mid range product often yields the most predictable budget.
Installation labour has different cost drivers. A two part polyurethane demands skilled hands and precise mixing, so contractors charge accordingly. Oil based options spread easier but require additional coats. The true cost accumulates through maintenance products, buffing pads, and periodic touch ups.
Consider these figures before committing:
- The cost per square metre, including product and labour
- The expected lifespan under your specific foot traffic
- The price of repair products when scratches appear
A premium finish on a rental property usually wastes money. A budget finish in a family home fails quickly. Match the wooden floor finish to the room’s actual demands.
Color Enhancement
South African light is a common saboteur. The wooden floor finish that looked honeyed in a Johannesburg showroom can flatten to grey in coastal humidity. The resin layer of the finish changes the way light reaches the stain, not the stain itself. Oil based coatings sink pigment toward the grain and bring up warmth. Water based ones lock that color onto the surface, leaving less room for the wood to speak. The same stain, different carriers, completely different visual temperature.
You can correct a bland tone with the sheen if you are not ready to strip the boards. Matte deadens the pigment, and in a midday sun room that gives a dusty cloud. Semi gloss lights the color, but every existing scratch stands like a seam. Satin with a slight green pigment neutralises the orange underfoot. The final coat should not hide the color. It must lift it or push it away.
- Apply two sheens to the same sanded off-cut before deciding.
- Wet the board first, because the wet look changes after the coat cures.

0 Comments