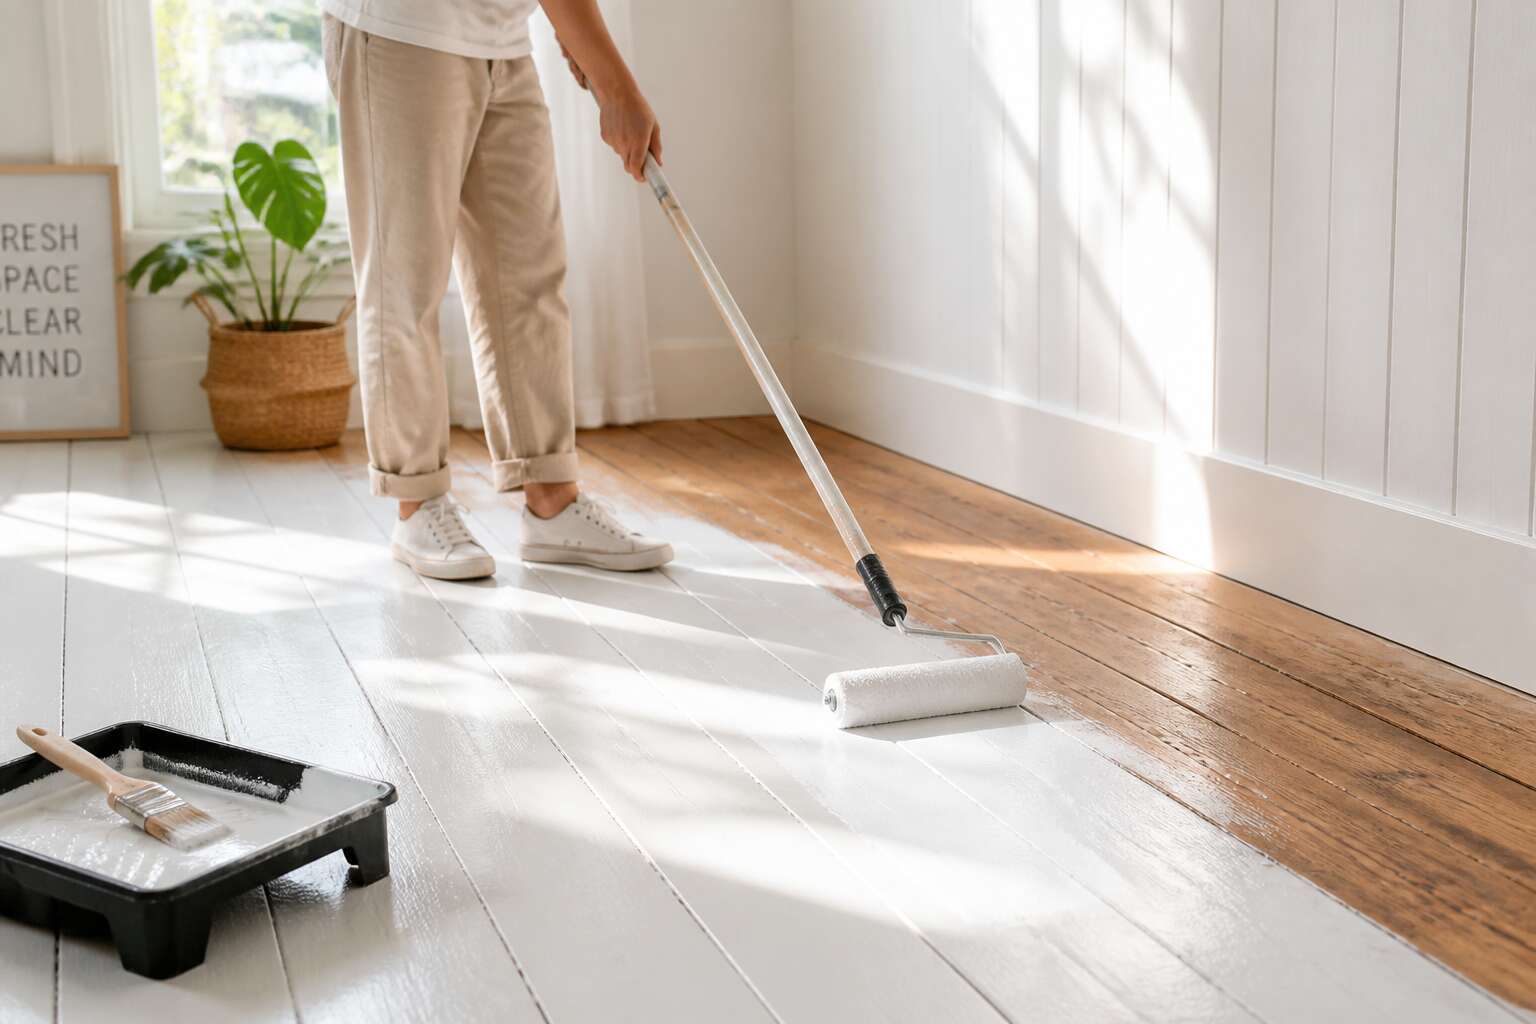
Why Choose the No-Sanding Approach for Wooden Floors
The Main Benefits of Skipping the Sanding Process
Floors in Durban homes carry decades of foot traffic. Sanding them removes years of character. To paint wooden floor without sanding is a decision to keep the original surface intact. You avoid the dust cloud that settles over curtains and furniture. You also protect the wood from thinning, which extends its serviceable life.
Skipping the sanding process brings several concrete benefits:
- No heavy machinery to rent or haul.
- No need to wait days for dust to subside.
- The original board thickness is preserved.
Preparation involves cleaning and applying a bonding primer, not aggressive abrasion. In older South African homes, where yellowwood planks are precious, this method respects the material while allowing a fresh finish. The result is a floor that feels renewed yet remains authentically itself.
Ideal Situations for Painting Without Sanding
Not every floor is begging for a sander. Some floors carry a paint film that is still whole, still tight, still doing its job. When the old coating has not cracked into alligator scale or lifted into bare wood, you can paint wooden floor without sanding and achieve a lasting result. The primer bonds to the existing paint, and the new topcoat locks onto the primer. That sequence works.
Think of a rental block in Durban where a tenant moves out on Friday and another moves in on Monday. The calendar will not allow a multi day sanding operation. The floor has existing paint, sound for the most part, with only scuffs along the traffic paths. That is the ideal profile. Clean the surface, apply a bonding primer, then roll on the chosen colour. The room is back in service within hours. Exactly what a working landlord needs!
- Homes with ornate skirting boards or wooden beading that a drum sander would chew through
- Floors that have been painted repeatedly and already sit thick with old layers
- Rooms where furniture can be shifted to one side but not removed entirely
Heritage properties in the Cape offer another fitting scenario. The original boards were cut from old growth yellowwood, and generations of paint form a record of the family. To paint wooden floor without sanding is to keep that record legible. The existing surface absorbs the new colour while keeping all that history beneath. This matters when homeowners wish to refresh a room without an invasive construction project. For those who live in older South African homes, the decision to paint wooden floor without sanding preserves the quiet character of the original timber.
Potential Drawbacks You Must Be Ready To Face
Choosing to paint wooden floor without sanding is a calculated trade, not a shortcut. The approach preserves the patina of age while resetting the surface colour. It also keeps dust out of your lungs and your furniture out of storage. The cost difference is tangible: sanding contractors charge per square metre, and that bill disappears entirely!
Yet the drawbacks demand honesty. When you paint wooden floor without sanding, you inherit the previous painter’s preparation standards. Chipped sections telegraph through the new paint unless you spot-fill first. Adhesion depends on the existing film’s integrity, so a flaking floor rejects the fresh layer within months. You also surrender the glass-like smoothness that sanding provides. The texture beneath remains as a record of every brushstroke. I have watched floors fail within a year when homeowners skipped this step.
Gathering the Right Materials and Tools
Selecting the Best Paint for Floor Surfaces
A full floor restoration can cost as much as a small car, depending on the square meterage. The good news is that you can achieve a similar transformation for a fraction of that price. The secret lies in your preparation and your choice of coating, not in expensive sanding equipment.
The first step is sourcing the correct materials. You do not need a drum sander or an industrial edger. You need a contractor-grade roller with a long handle, a quality brush for the edges, and a vacuum to remove every trace of dust. You will also need a degreaser and a tack cloth. The surface must be immaculate before any primer touches it.
Selecting the right paint is the critical decision. You cannot use standard wall emulsion. You need a product specifically engineered for horizontal timber. Look for a polyurethane or a floor-specific acrylic.
– These paints cure to a hard, durable film.
– They resist scuffing from foot traffic.
– They bind to the existing varnish without needing mechanical abrasion.
A bonding primer is non-negotiable. This special undercoat creates a chemical grip on the slick, old finish. Without it, your topcoat will peel within weeks. If you prepare correctly and choose the right products, your paint wooden floor without sanding project will stand the test of time. This approach trades labour for smart chemistry, saving you days of back-breaking work.
Why a High-Quality Bonding Primer Is Non-Negotiable
A single overlooked speck of dust can sabotage an entire floor coating. That is the reality of this method. To paint wooden floor without sanding, you need a specific toolkit. Each item plays a distinct role in preparing the surface:
- A contractor-grade roller with a long handle
- A quality brush for the edges
- A vacuum for dust removal
- A degreaser and a tack cloth
The vacuum removes loose debris. The degreaser breaks down residual oils. The tack cloth captures the fine particles that remain invisible.
The bonding primer deserves equal attention. This undercoat creates a chemical bond with the old varnish. Without it, your topcoat peels within weeks. I have watched homeowners skip this step and regret it. The primer is not optional. It is the difference between a floor that lasts years and one that fails by winter.
Essential Application Tools: Rollers, Brushes, and Trays
The material list is shorter than most assume, yet each item must earn its place. A contractor-grade roller covers the main area of the floor. A cutting-in brush handles the perimeter. The tray holds the primer steady while you move in sections. You can paint wooden floor without sanding only when the application tools suit the surface. A flimsy roller sheds lint into wet paint, and a poor brush leaves strokes that no topcoat will hide.
- Two roller sleeves, 10 mm nap, one for primer and one for the finish coat
- One 50 mm cutting-in brush for baseboards
- One sash brush for corners and thresholds
- Two deep trays to keep primer and paint separate
These items tend to get bought at the last moment, which is a mistake. A sash brush flexes into corners without scraping the old varnish, preserving the surface underneath. The right tools absorb the hardest part of the labour.
Protective Gear Every DIYer Should Wear
Before you commit to the process, consider what happens between the moment you open the can and the moment you peel off the tape. The materials you gather for prep work often determine whether you can paint wooden floor without sanding successfully. I always keep a box of nitrile gloves nearby, along with a respirator rated for solvent fumes.
- Safety glasses with side shields
- Knee pads for extended contact with the substrate
- Disposable coveralls if you are working indoors
The floor itself needs thorough degreasing, so a mild detergent and a microfiber mop belong on your list. Ventilation is also important. Open windows and position a fan to push air across the room. That simple step prevents the odour from lingering and keeps your focus sharp. When the protective gear fits properly, you forget you are wearing it, which is exactly when the work becomes enjoyable.
Preparing the Room and the Floor Properly
Cleaning and Degreasing the Wooden Surface Thoroughly
Before you paint wooden floor without sanding, the room itself demands attention. Move the furniture. Roll up the rugs. Take down the curtains if they hang near the skirting. Dust settles with determination, and it will find the fresh paint.
Cleaning the floor is where most plans stumble. A quick sweep will not suffice. You need a thorough degreasing, because old polish and everyday grime form a barrier that bonding primer cannot penetrate. Use a dedicated wood cleaner or a mild solution of sugar soap. Scrub with a stiff brush, paying attention to corners and door thresholds.
- Wipe the surface with a damp cloth after scrubbing.
- Wait for the wood to dry completely before applying anything.
- Check for sticky residue from old wax or cooking oils.
A clean floor matters more than any other step. Miss this step, and your paint will peel within months, regardless of the effort you invested elsewhere. I have seen it happen too many times.
How To Handle Existing Gaps, Cracks, and Staples
Preparing the room is a negotiation with your own belongings. The sofa will not move, and the bookshelf has grown comfortable in its corner. Clear the space entirely. Drape anything that remains in dust sheets, because timber dust and old paint flakes drift.
Now inspect the floor closely. Gaps between floorboards are not character, they are invitations for drafts and dirt. Use a flexible wood filler for smaller cracks, and pack larger voids with a suitable gap filler. Staples and nails, left behind from earlier installations, must be punched below the surface. A proud staple will ruin your roller and create a scar in the finish.
- Sweep and vacuum every seam before filling.
- Press filler firmly into each gap, then scrape level.
- Punch all metal fasteners beneath the wood surface.
Only then can you paint wooden floor without sanding and expect a respectable outcome. Those who try to paint wooden floor without sanding before sealing these gaps will see the flaws surface within months.
Protecting Walls, Baseboards, and Fixtures With Painter’s Tape
The room stands empty, but the walls, skirting boards, and fixtures remain exposed. Before you paint wooden floor without sanding, every surface that is not the floor needs protection. Painter’s tape is the tool that makes this possible!
Run tape along the bottom edge of skirting boards, pressing it down firmly to seal the seam. Wrap door frames where they meet the floor. Cover electrical outlets and light switch plates, or remove the covers entirely. Floor vents and radiator pipes need tape and plastic sheeting.
A few practical steps:
– Press tape edges with a putty knife for a crisp paint line
– Select medium adhesion tape that removes cleanly
– Tape plastic sheeting over larger fixtures
The tape creates a demarcation that helps you work methodically across the room. When you paint wooden floor without sanding, the prep work determines whether the final result looks intentional or accidental.
Managing Ventilation and Airflow for Optimal Drying
A single coat of floor paint can take a full day to cure in still air. The tape lines mark the boundary; the open window defines the working environment. The air you let in matters as much as the paint you roll on! When you paint wooden floor without sanding, the solvent in modern floor paints needs to escape steadily. Stagnant air traps moisture against the fresh film, delaying cure and dulling the sheen.
Cross ventilation sustains the evaporation rate. Two windows opened on opposite walls, or a fan set on low, keep the air moving. Coastal humidity in provinces like KwaZulu-Natal demands extra patience; clear days are preferable. The surface should stay near room temperature, around 20 degrees Celsius, for the chemical bond to form properly. Dry air gives the primer a fair chance to adhere, which remains the quiet objective when you paint wooden floor without sanding.
Checking the Moisture Content Before You Start
Moisture content determines whether your new coating holds or peels away in sheets. Before you paint wooden floor without sanding, try a simple polyethylene sheet test. Tape the plastic down, seal every edge, and leave it overnight. Beads of water underneath mean the wood is still releasing moisture, and any primer you apply will struggle to bond.
Prepare the room by clearing furniture, sweeping thoroughly, and wiping corners with a lint free cloth. Check these three conditions:
- Surface temperature above 15 degrees Celsius
- No oily residues from furniture polish
- Stable humidity for at least 48 hours
Coastal climates demand extra patience. A moisture meter reading above 12 percent indicates the floor is not ready for coating.
Step-by-Step Guide to Painting Wooden Floors
Applying the First Coat of Primer Evenly
The old boards drink in the primer, a quiet transformation that signals the start of something durable. Apply the first coat using a roller for the main field of the floor, but cut in along the edges with a brush first. A two inch brush works best for the perimeter.
Work in manageable sections to maintain a wet edge, which prevents overlapping lap marks from appearing later. The primer seals the porous wood and creates a mechanical key for the topcoat to grip. This step is fundamental when you prepare to paint wooden floor without sanding.
Working from the far corner towards the exit prevents you from walking through the wet finish. The first coat covers roughly one third of the floor before you need to refill the tray.
– The brush must reach into the groove where the floor meets the skirting.
– The roller handle extension reduces strain on your lower back.
– Pour the primer through a paint strainer to catch dried skin or debris.
The result is a uniform matte surface, ready for the following layer. A consistent first coat makes the finish more reliable. This is the point where the project stops being a surface treatment and becomes a foundation.
Laying Down the Base Coat With Long, Smooth Strokes
The primer has settled. The floor waits in a pale, expectant hush. Now comes the base coat, the layer that will carry the weight of foot traffic for years. Pour your paint into a tray lined with fresh foil. Load the roller evenly, then lay down long, smooth strokes following the grain of the boards.
Do not press hard. The roller should glide, not grind. I have seen more ruined finishes from overzealous pressure than anything else. Overlap each pass by half the roller’s width. Resist stopping mid-stroke. A broken line leaves a crease in the finish that catches the light.
- Work in strips parallel to the longest wall.
- Keep a wet edge to avoid visible seams.
- Let each board receive one continuous motion.
This method lets you paint wooden floor without sanding and still achieve a finish that survives the daily march of boots and bare feet.
Using Stencils or Layering for Decorative Painted Effects
Decorative painted effects turn a plain floor into a focal point. Stencils give you control over every shape without requiring a steady freehand. Secure the stencil with low-tack tape and work with a nearly dry brush, dabbing upward to build color gradually. Move across the room in a consistent direction. Allow each section to dry before overlapping the next stencil.
Layering produces a softer result. Paint the floor a solid tone, then apply translucent glazes mixed from a darker shade. Wipe the glaze back with a rag to leave color in the grain and low spots. The effect resembles aged timber, and I have seen it revive tired passages! This approach lets you paint wooden floor without sanding and still create custom dimension that a roller alone cannot deliver.
- Keep stencil direction consistent to maintain the pattern.
- Test the glaze on a spare board to gauge absorption.
Sealing the Floor With a Protective Polyurethane Topcoat
Once your final coat of colour has cured, the polyurethane topcoat becomes the final protective layer. This clear film absorbs daily abrasions without letting the painted surface beneath show damage. I always recommend two thin coats over one thick coat. A thick layer dries unevenly and may peel away in brittle sheets.
Apply the first coat with a lambswool applicator, working in long parallel strokes. Wait four hours, then buff lightly with a fine abrasive pad. Wipe away the dust with a tack cloth before the second coat. This routine creates a bond that transforms any paint job into lasting durability.
When you choose to paint wooden floor without sanding, the topcoat protects the old wood beneath the new colour. It seals the grain and locks in the pigment. For high traffic passages, add a third coat. Without this final barrier, the floor remains exposed to every scuff and spill.
Recommended Drying Times and Curing Periods Before Use
There is a quiet discipline to waiting. After you paint wooden floor without sanding, the drying schedule determines the final result. Most water based paints feel dry to the touch within two hours, but that surface dryness deceives. The paint continues releasing solvents for days.
Here is a realistic timeline:
- Two hours: light foot traffic in socks only
- 24 hours: gentle furniture placement with felt pads
- 72 hours: area rugs and normal walking
- 7 days: full curing before heavy loads or washing
Temperature and humidity alter these numbers. Cape Town winters slow curing considerably. If you paint wooden floor without sanding during a humid spell, extend every interval by half. The polyurethane topcoat needs its own cure time as well. Rushing a floor into service creates soft spots that never harden properly.
Common Mistakes To Avoid When Painting Without Sanding
Choosing the Wrong Paint Type for the Job
Choosing the wrong paint type is the fastest way to sink your budget when you plan to paint wooden floor without sanding. I have watched this mistake unfold in homes across South Africa. Standard wall paint lacks the flexibility and grip that foot traffic demands, so it peels within weeks.
You need a floor-specific product, like a water-based urethane or a formulated enamel. Some DIYers grab regular latex paint and hope the surface will cooperate. That choice leads to chipping and regret. The right options fall into a few categories:
- Oil-based alkyd paint for high-traffic zones
- Water-based urethane for quicker drying
- One-part floor paint with a built-in bonding primer
The sheen matters too. Satin or gloss outperforms flat finishes on worn boards. When you paint wooden floor without sanding, the old coating becomes your only anchor against moisture and daily traffic. Give it the right chemistry, and the finish holds for years. Choose poorly, and the repair bill follows quickly.
Skipping the Primer and Paying the Price Later
Skipping the primer when you plan to paint wooden floor without sanding is a gamble that rarely pays off. I have watched homeowners in Johannesburg make this choice to save a few hours, only to strip the entire floor four months later. The primer is not an optional extra. On unsanded boards, the existing finish is smooth and often glossy, which means your topcoat has nothing to grip. Moisture works its way under the film and causes delamination in patches.
The signs appear quickly:
- Peeling along high-traffic routes
- Cracks forming where the old coating meets the new
- Bubbles that burst when brushed
- A dull patchwork where moisture has crept through
By the time these problems show, the floor needs more than a touch-up. It needs a full strip and a fresh start. That costs more than the primer would have, and it takes twice as long!
Applying the Paint Too Thick or Too Fast
Applying paint too thick or too fast is the quickest way to ruin a project. I have watched South African homeowners pour on a heavy first coat, desperate to beat the afternoon thunderstorm. The surface dries unevenly, trapping solvent beneath a thin skin that looks flawless for exactly one day. Then the trouble begins.
When you paint wooden floor without sanding, you must lay down thin, even layers. Thick coats take too long to cure, and the base stays soft for weeks. The signs appear without warning:
- Wrinkles where the top cures faster than the base
- A sticky film that never hardens
- Footprints that dent the finish long after furniture returns
Each layer needs its own drying period. To paint wooden floor without sanding correctly, respect the clock. Rushing adds hours of repair later.
Walking on the Floor Too Soon and Creating Damage
The moment your final coat settles into place, a strange silence fills the room. The floor gleams. It beckons. And that is exactly when the trouble begins. That silky, flawless surface hides a fragile heart, one that stays vulnerable for days. I have seen proud homeowners, fresh from a weekend of labour, tiptoe across their handiwork to fetch a forgotten phone. The damage does not announce itself. It waits.
When you paint wooden floor without sanding, the paint relies on a chemical bond with the old finish. That bond forms slowly. If you walk on the floor too soon, you crush that delicate adhesion before it hardens. The result is a patchwork of scuffs, smudges, and dull spots that no amount of buffing will revive. The rule is simple: your feet are the enemy until the cure time fully passes.
- Bare footprints that etch into the finish like fossils
- Shiny patches where socks have polished the surface unevenly
- Hairline cracks radiating from heel impacts
Resist the urge to test the floor with your finger, your shoe, or a stray chair leg. Every touch leaves a memory. Once you have painted a wooden floor without sanding, treat it like wet cement for at least 72 hours. The wait feels eternal. The regret of rushing lasts much longer.
Ignoring the Importance of a Wear-Resistant Sealant
The most permanent damage I see on painted wooden floors comes from skipping the protective finish. When you paint wooden floor without sanding, the paint rests on a smooth, glossy surface. It does not bite in the way it would on bare timber. A wear-resistant sealant is the only guard between your work and the traffic it must survive.
Without this barrier, the paint receives the full load of daily use. Dragged chairs, pet claws, and grit from shoes wear the surface down. The colour fades unevenly and thin patches appear where traffic is heaviest. Once the finish breaks down, moisture works its way under the paint film and lifts it. I have watched three failure patterns repeat themselves:
- Peeling near doorways where boots get scuffed off
- Cloudy white stains where water sat on the surface
- Dull, greyed-out areas along main walking paths
How To Care for and Maintain Your Newly Painted Floor
The Best Cleaning Methods for Painted Wooden Floors
Once your painted floor has fully cured, daily maintenance keeps it looking new. Dust particles act like sandpaper under foot traffic, so sweep often. Use a soft broom or microfiber mop. For spills, wipe immediately with a damp cloth. Avoid soaking the wood. Harsh chemicals can dull the sealant; stick to pH-neutral floor cleaners.
Follow this simple cleaning rhythm:
- Dust daily with a soft-bristle broom.
- Damp-mop weekly with a well-wrung mop.
- Spot-clean stubborn marks with diluted gentle soap.
Standing water is the primary threat to painted surfaces. It seeps into micro-cracks and lifts the paint. If you chose to paint wooden floor without sanding, the underlying texture still reacts to moisture, so consistent care is non-negotiable. Place rugs at entrances and attach felt pads to furniture legs. This routine protects your finish for many seasons.
Daily Habits That Prolong the Life of Your Paint Job
A single resident logs roughly 1,500 steps across your floor each day. That is half a million footsteps a year, every one grinding dust into the paint. Survival comes down to small daily habits, not grand cleaning events.
Pick two minutes each morning to inspect high-traffic zones. Look for dull patches, nicks, or sticky residue. The earlier you spot wear, the cheaper the fix.
- Sweep entryways twice daily, especially after windy days.
- Slide felt pads under table legs and check them monthly.
- Scrape hardened candle wax from load shedding drips with a plastic card.
When you paint wooden floor without sanding, the sealant carries the full defence load. The primer grips the bare wood, but your polyurethane topcoat absorbs the punishment. A quick dry-mop pass before bedtime catches what settled during the day. Two minutes now prevents a full recoating project later.
How To Handle Scratches and Scuffs When They Appear
Once your painted floor passes its curing period, the maintenance routine starts. For anyone who chose to paint wooden floor without sanding, the topcoat provides the protection. Wipe spills instantly, and use a microfiber mop with plain water each week. Harsh detergents soften the urethane, so skip them.
Scratches and scuffs will appear. For light marks, a damp cloth and gentle rubbing usually clears them. Deeper scrapes need a thin layer of floor paint applied with a small artist brush, then a fresh polyurethane patch. Here is a quick checklist:
- Inspect corners weekly for dulling.
- Touch up nicks before moisture seeps in.
- Use furniture pads to prevent gouges.
Acting early protects the film, so your floor stays resilient. Freshness lasts years if you respond fast.
Using Rugs, Felt Pads, and Furniture Protectors Wisely
Felt pads and rugs extend the life of any finish, but their placement matters. When you paint wooden floor without sanding, the topcoat cures into a thin film that rewards forethought. A rug near the entrance catches grit before it scrapes the urethane. Felt pads under chair legs glide across the surface without leaving crescents. Furniture protectors distribute weight where the frame presses down. I position these shields before moving anything back into the room, and the difference shows in the sheen.
Rugs need breathable backing, since trapped moisture dulls the paint. Felt pads require replacement once they collect sand. Protector cups should sit flush against each leg. Your floor becomes a quiet system of barriers, each one absorbing what daily life throws at it. Careful placement now preserves the colour and texture for years.
When Is It Time To Apply a Fresh Coat or Repaint?
The first sign of wear on a freshly painted floor arrives without ceremony. A weekly dust mop removes the grit that acts as a gentle abrader. Spills require same hour attention, for water pooling on a floor you chose to paint wooden floor without sanding will find unseen gaps. The sheen dulls along busy paths within months. The change is honest wear, visible proof of daily use.
So when does one reach for the roller again? The signs are legible:
- Water no longer beads on the surface.
- Stains linger despite prompt cleaning.
- The gloss fades unevenly across traffic lanes.
Busy households repaint every two to three years. A full repaint, the chance to paint wooden floor without sanding from scratch, comes only when the base colour wears through to bare timber.

0 Comments