Hardwood Floor Adhesives: Comprehensive Guide to Glues and Installation
Choosing the right hardwood floor adhesive
In hardwood flooring, the adhesive is the quiet backbone. A SA renovation survey found that 68% of mislaid floors trace to the wooden floor glue itself, not the boards. The right choice keeps planks level, minimizes squeaks, and endures the sun-drenched days of our climate.
Between water-based, polyurethane, and MS polymer options, the selection hinges on subfloor type, moisture, and wood species. The wooden floor glue you pick should offer ample bond strength without excessive expansion, preserving room for seasonal movement.
In South Africa, installers value low odor, quick bonding, and UV resistance as coastal and inland environments demand different performance. A versatile adhesive bridges gaps and handles temperature swings, keeping joints tight without compromising finish.
With the right adhesive, a floor feels solid beneath each step—a small detail with outsized impact on mood and longevity!
Preparation and surface readiness
Hardwood floor adhesives demand more than bravado; they require surface respect. In the theatre of installation, preparation is the quiet hero that keeps joints honest and planks level. The discipline begins long before the first plank meets the room.
Before any wooden floor glue meets destiny, the subfloor should whisper of flatness and dryness, verified by a trusted moisture test. A sound readiness ritual saves you morning regrets and warranty questions.
- Subfloor flatness and repairs
- Surface cleanliness and dryness management
- Material acclimation and manufacturer guidance
With a proper foundation, the adhesive does its quiet work—steady, restrained, and ready to withstand seasonal movement as one expects in South Africa’s sun-drenched days.
Application techniques and tools
Every successful wooden floor starts with discipline, not drama. The right wooden floor glue creates a quiet alliance between planks and subfloor, letting the floor breathe without buckling. “A good glue is the quiet handshake that keeps joints honest,” a veteran installer likes to say.
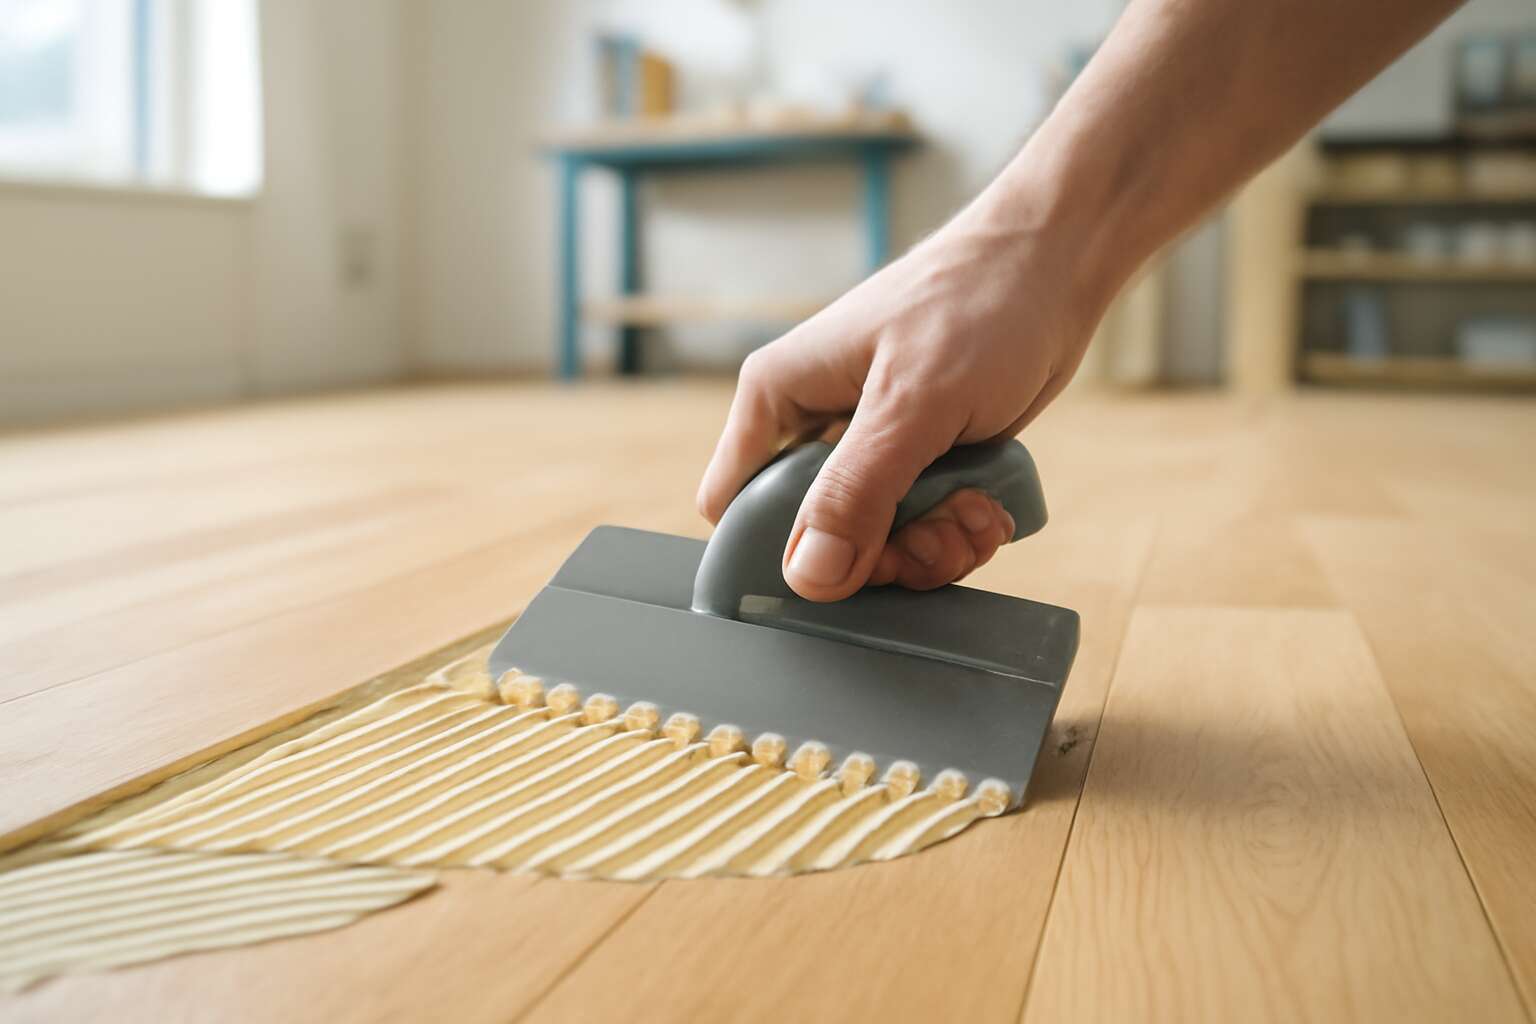
With the installation in mind, apply a consistent bead along each run, then comb it with a notched trowel for uniform coverage. The adhesive should be worked to the edges without gaps; a light roller helps consolidate the surface and expel air pockets as it cures.
- Notched trowel sizes appropriate to your adhesive
- Rolling tool or brayer for extra contact
- Spacers and alignment guides to keep gaps controlled
- Weights or clamps to hold boards during initial set
Choose a glue with appropriate open time and moisture tolerance, and let the room conditions guide your timing. Acclimate the product as manufacturer guidance dictates, and respect slope and expansion gaps so the floor moves gracefully with heat and humidity.
Curing, acclimation, and room conditions
In South Africa’s sun-warmed rooms, a floor that endures learns to breathe. The right wooden floor glue for our climate is a patient partner, binding planks while the subfloor sways with the seasons. “The quietest joints carry the strongest stories,” a veteran installer likes to say.
Acclimation is not an afterthought but the opening act. Let boards come to room temperature and settle to their natural moisture, honoring the room’s rhythm rather than coercing it. This discipline softens future gaps and buckling as the glue cures.
- Consistent ambient temperature (roughly 18–24°C)
- Predictable humidity range (around 45–60% RH)
- Good ventilation to move air and moisture evenly
Curing and room conditions sculpt the final surface, turning timber into a durable memory. When care guides the process, the floor settles with quiet dignity and a longevity that rewards patience and craftsmanship.
Post-installation care and long-term maintenance
The memory of a floor outlasts the punchy trends: the quietest joints carry the strongest stories. South Africa’s sun-burnished rooms demand patience, not panic. The right wooden floor glue is less a miracle and more a patient partner—holding planks steady through seasonal sway.
Post-installation care is steady, not sensational. Regular, gentle cleaning, steady humidity (45–60% RH), and strategic protection keep the surface honest. In sunlit corridors, practice restraint; let the boards breathe and the climate do the talking.
- Dust with a soft broom or vacuum with a wood-floor setting
- Use manufacturer-approved cleaners—no ammonia or wax buildup
- Fit furniture with felt pads and door mats to minimize scuffs
Long-term maintenance means checkpoints, not heroics. Expect minor gaps, lift, or wear with seasons; address them promptly with a pro. Refinish when the finish profile fades, and treat upkeep as a craft, not a chore.



0 Comments