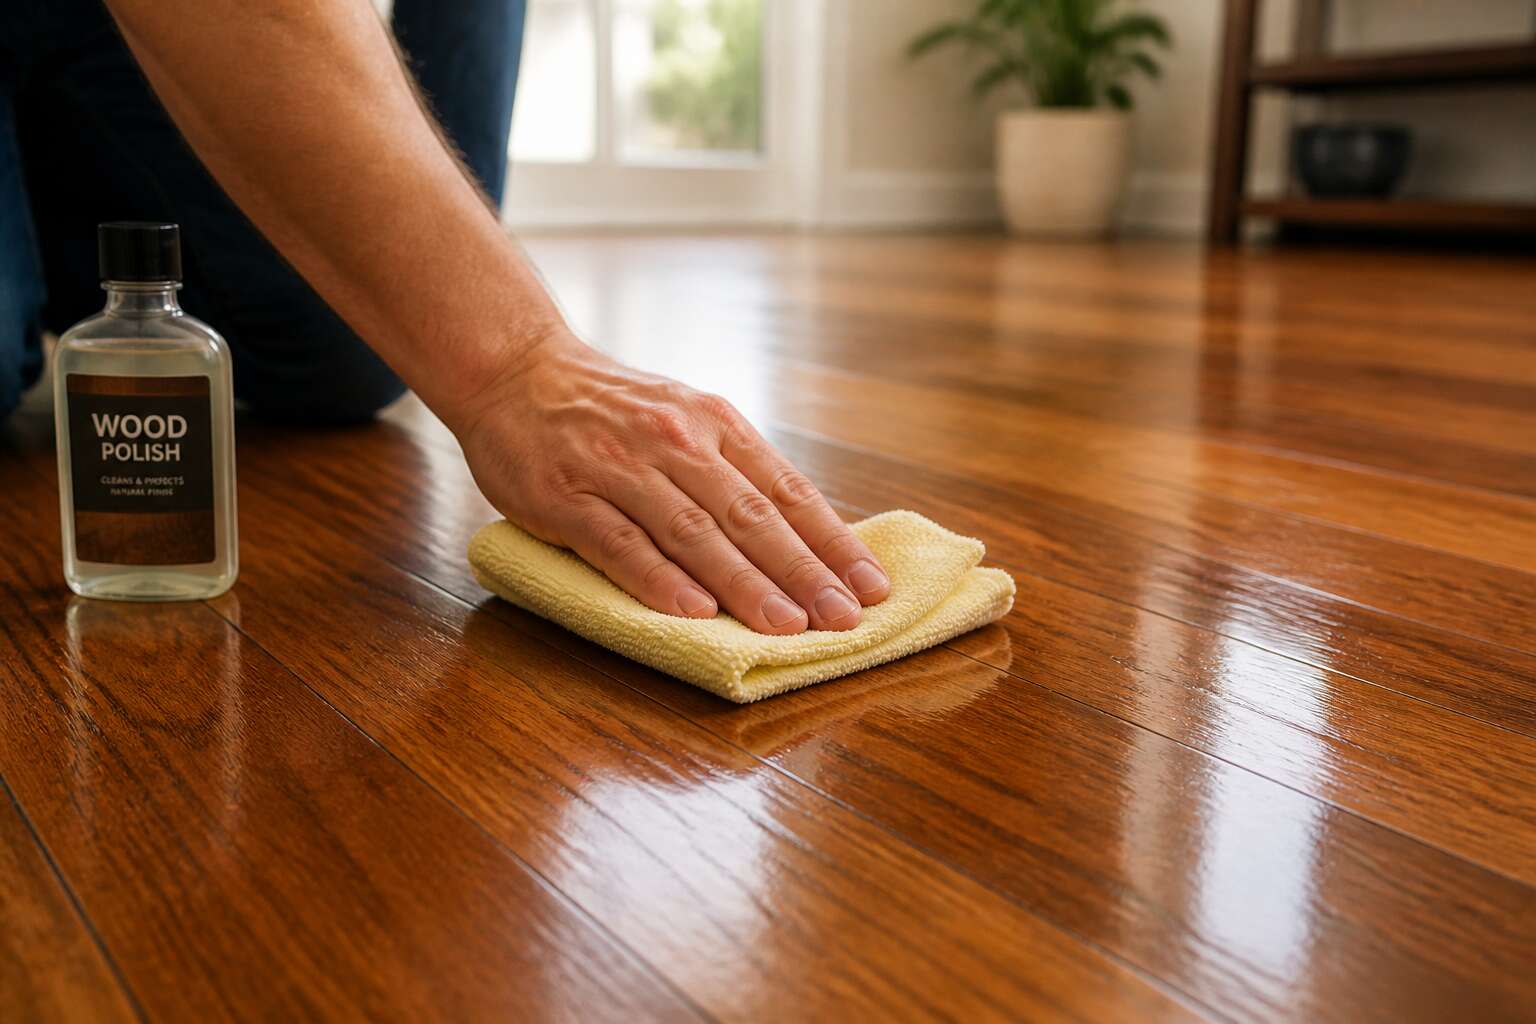
Assessing Your Floor Type and Condition
Identifying Solid Wood vs. Engineered Wood
Solid wood and engineered wood demand different care, yet most homeowners grab the wrong polish without a second thought. Before you learn how to wooden floor polish, you need to identify what lies beneath your feet. Solid planks are typically 18 to 20 millimeters thick and can be sanded repeatedly. Engineered boards, however, feature a thin veneer, often only 2 to 4 millimeters, over layers of plywood. Sand through that top layer and you ruin the grain.
Here is a quick check:
– Examine the edge of a floor vent or remove a loose plank.
– Solid wood shows the same grain on both sides of a cross section.
– Engineered wood displays a visible plywood or HDF core beneath the veneer.
Your floor’s condition also matters. Surface scratches on a solid floor are cosmetic, but deep gouges in engineered wood signal trouble. Knowing this difference guides your entire approach, so you do not waste effort or damage the investment when you finally polish.
Evaluating the Current Finish (Wax, Varnish, or Oil)
Assessing Your Floor Type and Condition
Before you commit to any method for how to wooden floor polish, assess what your floor has already endured. Run your hand across the surface. Does it feel waxy, sticky, or smooth? That texture reveals the finish.
Evaluating the Current Finish (Wax, Varnish, or Oil)
Varnish creates a hard, glossy shell. Oil soaks into the grain, leaving a matte, breathable surface. Wax sits on top, soft and vulnerable to water. Each finish demands a different approach.
Check for bare patches. Water beading up means a sealed surface. Soaking in reveals exposed wood. Try this quick test:
- Place a few drops of water on the floor.
- Wait ten minutes.
- If the water beads, the seal is intact.
- If it darkens or soaks in, the finish has failed.
Your floor’s finish dictates every subsequent decision in how to wooden floor polish. Match your product to that reality or risk a dull, blotchy result.
Gathering Essential Tools and Materials
Stand at the threshold and study the floor. Every scratch, dent, and dull patch tells you where feet have travelled. In South African homes, the movement between summer’s humidity and winter’s dry heat leaves its signature on the grain.
Run a fingernail across an inconspicuous corner. Softness indicates decay. Brittleness signals dryness. The wood’s response to pressure reveals whether it can handle another polishing cycle. This tactile investigation matters as much as any visual check, and I trust it more.
Before attempting how to wooden floor polish, gather what you need:
- Soft bristle broom to lift embedded grit
- Microfibre mop with a fresh head
- Clean cotton cloths for buffing
The order matters! Polish applied to a dusty surface creates a slurry that abrades the wood. Those grey scratches under the sheen come from skipping this step. Materials prepared in advance make the process of how to wooden floor polish predictable.
Understanding Safety Precautions and Ventilation
The first step to fixing a floor is admitting it has a problem. Press a knuckle near the skirting board. Listen for a hollow answer. That sound means the boards have separated from the joists, a problem no coat of how to wooden floor polish can solve. In coastal South African homes, salt air and humidity accelerate this deterioration. Check for damp spots near doorways. Run your palm over the surface. A sticky residue indicates old polish that has not cured properly. That residue will react badly with a fresh coat.
Before you plan how to wooden floor polish, sort out your ventilation. Those aromatic solvents do more than scent the house. They can trigger headaches and worse.
- Open at least two windows.
- Use a fan to direct fumes outward.
- Keep the door closed to protect other rooms.
- Wear a mask rated for organic vapours.
Your nose is a poor safety instrument. Trust the mask instead.
Preparing the Surface for a Flawless Polish
Clearing the Room and Protecting Furniture
A room full of furniture is a room that cannot be polished properly. Before you begin to learn how to wooden floor polish, you must create a blank canvas. Move every chair, table, and rug out of the space. If the room is too large, work in sections, but understand that a single stray object will force you to stop mid-task.
Protecting the items you cannot move requires equal attention. Drape drop cloths over fixed cabinets and use painter’s tape to secure plastic sheeting over doorways. The goal is to keep dust and polish residue from settling on surfaces you do not intend to clean.
- Remove all curtains and lightweight drapes
- Lift small appliances onto countertops or tables
- Place felt pads under any furniture that stays behind
This preparation feels tedious, yet it prevents scratches and staining. A clear floor also improves air circulation, which helps the finish dry evenly. Take your time here, and remember that how to wooden floor polish becomes far simpler once the room is stripped down to its bones.
Dusting and Vacuuming Loose Debris
Once the room is stripped bare, the dust bunnies have nowhere to hide. Address the floor with a soft bristle broom or a vacuum set to hardwood mode. A rotating brush can scratch timber, so check that setting first.
Work from the far corner toward the doorway. This method stops you from treading grit back onto clean planks. For edges and skirting boards, use a crevice tool or a dry microfiber mop.
- Sweep twice if the floor has not been cleaned in months
- Inspect for protruding nails or splinters that could tear a polishing cloth later
- Wipe sticky residue with a damp cloth, then dry the area immediately
Loose debris is the main enemy when learning how to wooden floor polish. Sand and grit act like sandpaper underfoot, so a thorough vacuum makes the polishing step far less dramatic.
Deep Cleaning with a Damp Cloth or Mop
Once the vacuum has done its duty, the floor still harbors a film that no broom can dislodge. This is where the damp mop enters. Water is not the enemy, but excess moisture is. Wring the mop until it barely weeps, then work along the grain. Leftover residue will mix with polish and create a hazy smear.
For stubborn spots, a cloth with a splash of pH-neutral cleaner works. Check the corner where the dog used to sleep. That crusty patch needs attention before any finish touches it. The surface must be dry before the next phase.
Here is the order that saves you from yourself:
- Damp mop one section at a time
- Rinse the mop after every pass
- Dry the section with a clean microfiber cloth
This deep clean sits at the core of how to wooden floor polish. Skip it and you are polishing dirt into the grain.
Removing Stubborn Scuffs and Old Wax Buildup
Now the true test begins. Scuffs and old wax buildup resist a gentle sweep. They need intervention, the kind involving a plastic scraper and a steady hand. When you learn how to wooden floor polish properly, you accept that preparation matters more than the final coat.
For stubborn scuffs, use a soft cloth with a splash of mineral spirits. Test in an inconspicuous corner first. Old wax buildup clouds the surface and sits in the grain. A commercial wax remover, applied with fine steel wool, breaks it down.
Here is the ritual:
- Apply the remover along the grain.
- Wait the instructed time, no longer.
- Scrape with a plastic putty knife.
- Wipe the residue before it dries.
The floor must feel clean to a bare foot. If it squeaks, you missed a spot. This is the truth of how to wooden floor polish: the surface decides the outcome.
Selecting the Perfect Polish and Application Tools
Water-Based vs. Oil-Based Polishes: Pros and Cons
The floor waits like a patient under lamplight. Selecting the perfect polish requires understanding its history, its grain, its mood. Application tools matter too: lambswool applicators, synthetic pads, and brushes each lay down the finish differently.
Water-based polishes dry fast and stay clear, but they reveal every flaw. Oil-based alternatives seep into the grain, deepening the wood’s colour to a dark honeyed amber.
Consider this when you learn how to wooden floor polish:
- Water-based: low odour, quick recoat, less durable
- Oil-based: rich tone, forgiving application, longer curing
The choice is a pact with time itself.
Choosing Between a Mop, Cloth, or Electric Buffer
Knowing how to wooden floor polish starts with reading foot traffic. A sitting room used rarely needs a different polish than a passage worn by morning boots. The sheen level, gloss or satin, should match the wood’s present condition, not an ideal.
The tool used to lay the polish matters equally. A microfibre mop covers wide, unbroken areas quickly but leaves shadowed edges untouched. A folded cloth with a short nap provides control near skirting boards and thresholds. An electric buffer with a lambswool pad suits long hallways and open-plan rooms, demanding a steady hand.
- Mop: for open spaces without obstacles
- Cloth: for edges, corners, and repair work
- Electric buffer: for large continuous floors and old layers
Most South African homes rely on more than one implement. The room’s layout, the age of the floor, and the condition of the previous layer decide which tool is used most.
Polish vs. Wax vs. Multi-Surface Cleaner
In Cape Town’s damp winters, the wrong cleaner can turn a glossy oak floor into a blotchy surface. Choosing between polish, wax, and a multi-surface cleaner depends on what the floor already carries. Polish builds a protective film, wax feeds an oiled surface, and multi-surface cleaner only lifts daily grime.
Ask yourself one question: is the floor sealed or bare? A sealed floor accepts polish; a waxed floor demands wax; an unsealed floor needs neither. For a quick refresh, use a multi-surface cleaner, but for true restoration, match the product to the existing layer.
- Polish: for sealed floors seeking shine
- Wax: for oiled or waxed floors needing nourishment
- Multi-surface cleaner: for routine upkeep without buildup
Understanding how to wooden floor polish means respecting that each product serves a specific purpose. Apply the wrong one, and you will spend a weekend correcting the outcome.
The Step-by-Step Polishing Process
Applying the First Thin, Even Coat
Applying the first thin, even coat asks for a steady hand and a quiet eye. This pass sets the tone for everything that follows, so resist the urge to press hard or lay down thick strokes. Work the polish into the wood with a soft cloth or applicator, moving in the direction of the planks. The goal is a sheer, uniform film that enhances the grain without leaving puddles.
Slow and steady works better than fast and careless. Glide the applicator in long, uninterrupted strokes, overlapping each pass by a few centimetres. Watch the corners and edges closely, because polish tends to pool there and dry unevenly. If a section looks streaky while still damp, smooth it out immediately.
When you learn how to wooden floor polish properly, you understand that the first coat is purely a foundation. It is not about shine yet. Let the product penetrate and dry completely before you even think about a second layer. Rushing this stage will trap moisture and leave a dull, patchy finish.
Working in Manageable Sections
Working in manageable sections is where most floor polishing goes wrong. You cannot buff an entire lounge in one sweep. Pick a section you can reach without stretching, about one to two square metres. Finish that section completely before moving on.
Here is the sequence:
- Start at the far corner, nearest the exit
- Work backwards so you never tread on fresh polish
- Move to the next section only once the current one is fully covered
This method keeps polish wet where you work and dry where you have been. Many people skip this part of how to wooden floor polish and pay for it with uneven patches. Covering the whole floor at once creates lap marks and regret. Learning how to wooden floor polish properly means controlling each small patch before advancing. You are building a finish, one section at a time.
Buffing and Drying Between Coats
Buffing between coats is where patience becomes part of the process. After the first thin coat sets, most people reach for the next can too soon. That is a mistake. The surface needs to dry to the touch but remain slightly receptive. You can test this with a fingertip on an inconspicuous corner.
The sequence that works well:
1. Wait the manufacturer’s recommended time, usually two to four hours
2. Run a dry cloth or buffer pad over the surface to remove raised grain
3. Check for dull spots that need another thin coat
Then repeat the process for each additional layer. This is the part of how to wooden floor polish that separates a lasting finish from one that peels within months. I have seen floors ruined by rushing the dry time between coats. The polish needs to cure, not just feel dry. Light buffing opens the surface for the next layer to bond. Skip it and you create a weak joint that will fail under foot traffic.
Deciding on a Second Coat
Applying the second coat is rarely about deepening the colour. It is about building a film thick enough to absorb the daily punishment of bare feet, pet claws, and dragged chair legs. For most residential spaces, two coats are the sweet spot. Three suits heavy-traffic areas like a passage or a home office. Understanding how to wooden floor polish properly means knowing when to stop. Inspect the surface under daylight. If you see dull patches or an uneven sheen, apply another layer. If the finish looks uniform and glossy, resist the urge to add more. Extra polish can become brittle and peel away from the wood beneath.
The sequence itself is simple:
1. Wait for the manufacturer’s recoat window to pass.
2. Inspect the current coat for missed spots or thin areas.
3. Apply a fresh thin layer using the same working pattern.
Each coat should be slightly thinner than the last. That is the trick most people miss. How to wooden floor polish also means recognising when your floor has reached its limit, and leaving it alone.
Curing Time and Allowing Full Drying
The final cure demands patience. A floor may feel dry within hours, but that sensation is misleading. The solvents beneath need days to evaporate fully. Understanding how to wooden floor polish includes respecting this waiting period.
Most manufacturers specify a cure window. For water-based polishes, this is often seven days. Oil-based formulas can take longer. The film hardens gradually as solvents escape. Placing a rug or moving furniture back too soon can leave permanent marks in the finish.
Here is what the waiting period looks like in practice:
- Day one: the surface is touch-dry but soft.
- Day three: light foot traffic is acceptable.
- Day seven: the film reaches full hardness.
The room should stay ventilated and at a stable temperature. Coastal humidity or Highveld heat can alter drying times. The last coat is only as strong as the cure it receives, a detail often overlooked when learning how to wooden floor polish.
Extending the Shine and Preventing Damage
Daily Dusting and Routine Maintenance
Fine dust is relentless. A single gram carries thousands of abrasive particles that grind into the floor’s protective layer with every footstep. This is why daily dusting matters more than any polish application. Learning how to wooden floor polish is only one part of the process. The other part is your morning routine. Use a soft-bristle broom or a microfiber mop designed for hardwood. Skip the vacuum’s beater bar, it leaves marks. Here is a simple weekly rhythm:
– Place doormats at every entrance to trap grit.
– Use felt pads under furniture legs and check them monthly.
– Wipe spills immediately with a damp cloth, never soak the wood.
– Keep indoor humidity between 40 and 50 percent.
These habits preserve the shine long after the polish dries. They also prevent the micro-scratches that dull the surface. When you revisit how to wooden floor polish, remember that a clean floor accepts the finish more evenly than one carrying the remnants of the day before.
When and How Often to Re-Polish
Extending the shine is a matter of observation. A polished floor reflects light evenly because the top layer is intact. Once you notice dull spots in high traffic zones, the protective coat is thinning. That is when you need to think about how to wooden floor polish again.
Preventing damage between coats means controlling the environment. A doormat at the entrance catches more than dust. A felt pad under a chair leg stops a scrape before it happens. Sunlight is another factor; prolonged exposure can yellow certain finishes, so consider curtains in rooms facing the afternoon sun.
How often you re-polish depends on foot traffic. A busy kitchen will need attention every two months. A quiet guest bedroom can go for six. The surface itself signals the moment:
- roughness under bare feet
- a hazy appearance in the light
- water beading less readily on the surface
When those signs appear, the finish has worn thin. Every week you delay lets dirt push deeper into the unprotected grain. Knowing how to wooden floor polish before that stage saves you from sanding later, and it keeps the shine alive between each cycle.
Using Rugs, Pads, and Furniture Protectors
The interval between polish coats is where floors collect most of their damage. A woven runner in the passage catches grit that would otherwise grind into the finish. A felt pad under the dining chair stops a scrape before it begins. Sunlight fades finishes unevenly, so a curtain in the west-facing room keeps the colour uniform. These measures extend the life of the top coat.
Furniture protectors work best when you check them regularly. I have seen a floor ruined by a single table leg that lost its felt months earlier. Castor cups under heavy sideboards spread the load. Rugs near the kitchen sink absorb the splashes.
- Place doormats both outside and inside every entrance
- Replace felt pads once they flatten or harden
- Lift furniture when moving it, never drag
Ask how to wooden floor polish before the scratches deepen and you might never need to. Knowing how to wooden floor polish is about preventing the damage before it starts.

0 Comments