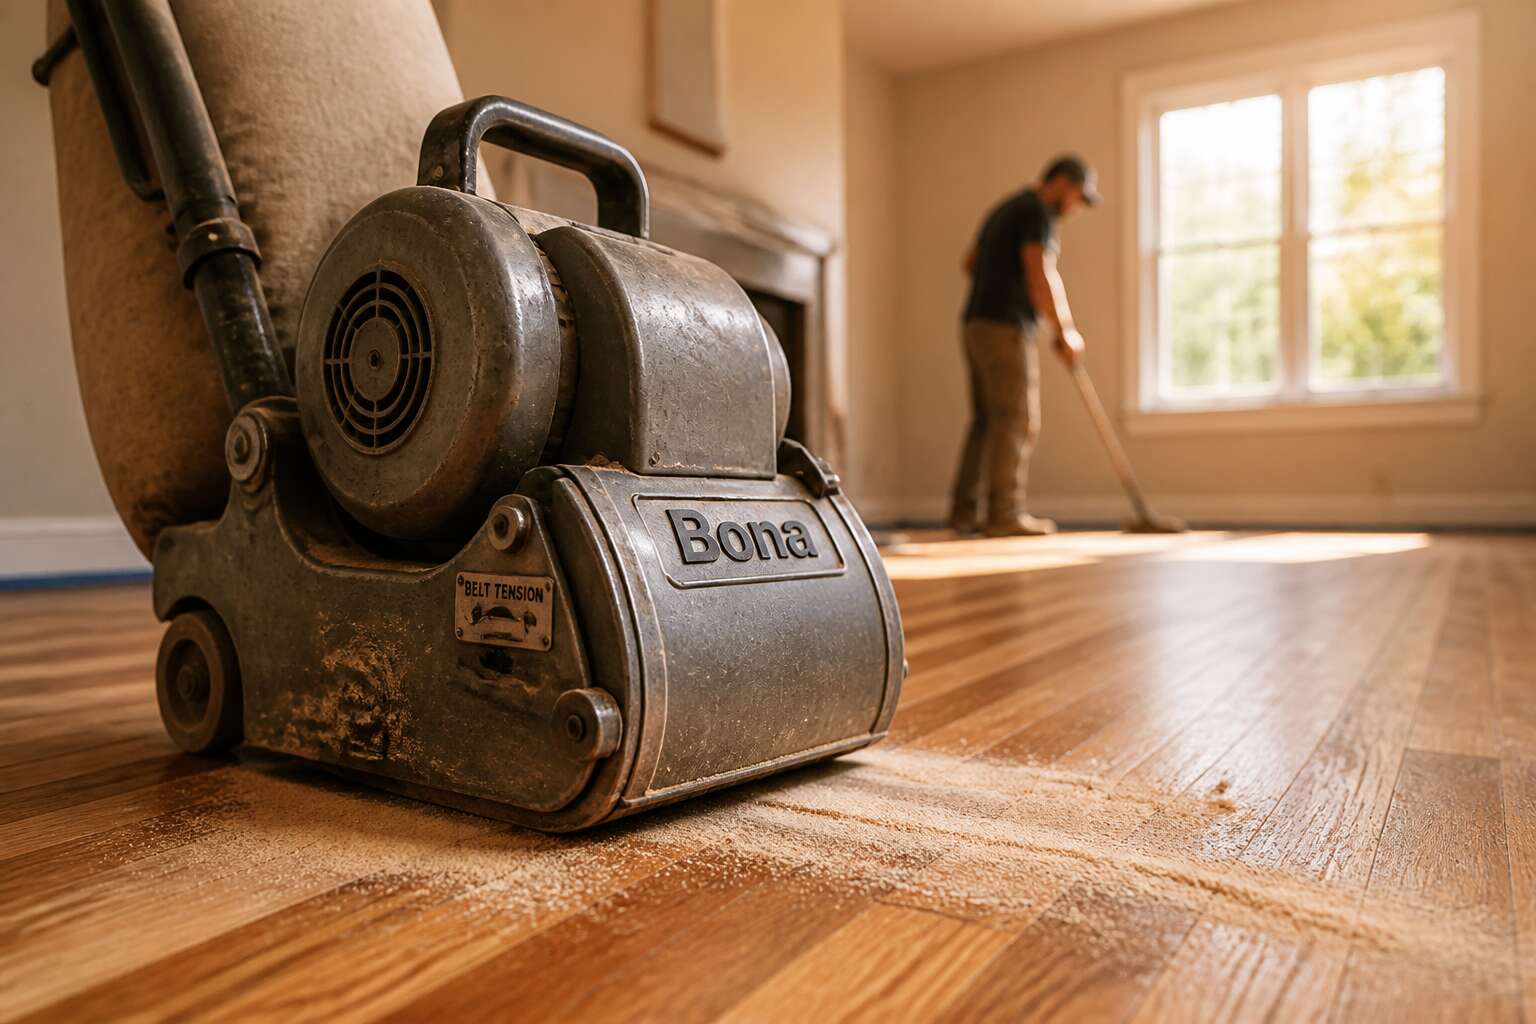
Assessing the Scope of Your Floor Sanding Project
Evaluating the Condition of Existing Floorboards
Assessment begins with a tactile inspection, not a visual one. Run your hand along each floorboard and note any give. A swollen spot or a faint dark line can signal deeper trouble. A wooden floor sander for hire demands a stable surface; loose planks will catch the drum and tear the abrasive paper.
- Check for protruding nails that need countersinking.
- Measure the moisture content with a handheld meter.
- Identify old finishes, because oil and varnish react differently.
The condition of existing floorboards dictates everything from machine choice to sandpaper grit. Water stains and cupping indicate long term exposure, while sharp edges mean the wood has never been sanded. Knowing these details prevents costly mistakes. Your evaluation should map out damaged zones and decide whether partial or full restoration applies. That clarity makes the wooden floor sander for hire a practical choice.
Calculating the Total Square Footage and Realistic Timeline
Measuring a room sounds simple until you realize the corridor has three alcoves and a built-in cupboard. Walk the perimeter with a tape measure, multiplying length by width for each rectangle. Add a 10% overage for wastage and awkward corners. That number tells you how much paper and time you need, but not the hours. The realistic timeline depends on machine familiarity.
Most South African homes take three working days from first pass to final coat. A complete novice should add a day just to kiss mistakes goodbye. A wooden floor sander for hire speeds up the grit sequence, but only if you plan the schedule around drying times and rental periods.
- Measure every separate area
- Multiply length by width
- Add 10% for wastage
Then calculate based on four square metres per hour. That gives you an honest estimate for your project, whether you are refinishing a bedroom or a full dining space. The process rarely rewards haste, so build in buffer time between coats. The wooden floor sander for hire remains the efficient option, but your measuring tape decides the true scope.
Identifying the Type of Timber and Its Specific Sanding Needs
Most floor sanding failures begin before the machine starts humming, when the timber type goes unrecognised. Meranti and pine dominate South African floors, but each responds differently to the drum. Meranti’s open grain requires a staggered grit progression; pine’s softness cannot withstand heavy pressure. The wooden floor sander for hire offers adjustable speed, yet the timber species determines the starting grit. Oak, common in older homes, displays strong chatoyancy when sanded from coarse to fine. Identify the wood by examining the end grain or unfinished edges.
- Pine: soft, prone to denting, use fine grits early.
- Meranti: medium density, requires careful edge work.
- Oak: hard, tolerates aggressive cutting.
A wrong grit or incorrect sanding direction scars the surface permanently. No machine can undo errors made before its first pass. Knowing the timber’s hardness changes the belt choice and working speed.
Consulting Manufacturer Guidelines to Preserve Your Warranty
Seventy percent of sander damage claims trace back to overlooked details. Before you even consider a wooden floor sander for hire, measure every doorway, stairwell, and transition strip. A drum sander that fits your main room may not fit your hallway. Those bottlenecks define the true scope. You might need an edger for the perimeter and a detail sander for the corners. Budget for those rentals now, not after the machine is already in your van.
The rental agreement usually includes the manufacturer’s operational limits. Read it. Ignoring those guidelines voids your warranty faster than a blunt belt. Most machines require specific belt sizes and vacuum attachments. Using aftermarket parts seems harmless, but the manufacturer tracks the wear. If the drum seizes, they will inspect the motor and the usage log.
– Measure every doorway, not just the main floor area.
– Check the power supply for the sander’s amperage draw.
– Confirm the belt size matches the machine’s manual.
One missed measurement or a skipped guideline check turns a weekend project into a fortnight of repairs. The physical floor area is only half the picture. The architectural details and the machine’s contractual rules dictate the real workload. Plan for both, and the hire becomes a tool. Skip them, and it becomes a liability.
Selecting the Appropriate Machinery for the Job
Comparing Belt, Drum, and Orbital Sanding Machines
The roar of a drum sander is a sound of transformation, though it demands respect and a steady hand. For most projects, this machine remains the workhorse, stripping away old finishes with a ferocity that is both thrilling and efficient. It moves with the grain, and stopping it while it is in motion will leave a divot you will be cursing for hours, a lesson best learned on someone else’s timber. Its raw power is necessary for those first, deep cuts that reveal the true colour of your floor, so consider the surface area you are tackling before you commit to this particular beast.
Yet, the choice is not always that straightforward. A belt sander, often lighter and more manoeuvrable, offers precision for the edges and corners where the larger machine cannot reach. It is the artisan’s tool for the final flourishes, allowing you to feather out those tricky shadows and imperfections. For those who have never operated such equipment, the learning curve can be steep. This is where the advantages of a wooden floor sander for hire become clear, as you have the freedom to select a model suited to your skill and the specific demands of the room. Many hire companies will also offer advice on the correct grit sequence, which is invaluable.
– Drum sanders: powerful, aggressive, requires skill to prevent gouging.
– Belt sanders: flexible, better for edges, requires a lighter touch.
– Orbital sanders: gentle, leaves a fine finish, best for the final pass.
If you find yourself facing a floor that is merely dull rather than deeply scarred, the orbital sander is a more forgiving companion. It does not pull or grab in the same way, and it leaves behind a pleasing, uniform swirl that is easily polished away. It runs smoother and quieter, allowing for a more contemplative pace. Many a homeowner has found that this machine is their true ally, connecting the physical effort of restoration with the meditative rhythm of the work itself. The right choice hinges on the gulf between cosmetic refreshment and complete renovation, and your honest assessment of your own patience and fortitude.
Choosing a Dedicated Edger for Corners and Perimeters
The main sander will leave the borders untouched. A dedicated edger, often a disc sander with a vertical spindle, handles those final inches. It is a violent machine! Spinning at high speed, it demands a firm grip. My first attempt taught me to keep it moving, always parallel to the skirting, or it will leave a scar that no amount of filler will hide. For doorways and cupboards, the edger’s circular pad reaches where the drum cannot.
Different timber requires different discs.
- 36 grit removes heavy paint along the edges.
- 80 grit blends the edger’s work into the main floor.
- 120 grit prepares the surface for sealer.
A wooden floor sander for hire package often includes an edger, saving you a second booking. Noisy and dusty, it remains the only way to achieve a uniform result. Skirting and architraves stay untouched by the larger machines, making the edger your primary instrument for confined spaces.
Understanding the Role of a Floor Buffer in Finishing
The floor buffer gets little respect. That is a mistake. After the edger works the borders, the buffer determines whether your sealer looks professional or amateur. A wooden floor sander for hire package often includes the buffer, but the rental agent rarely explains its role. The buffer does not cut timber. It removes the loose fibres and dust left by the 80 grit pass. It then levels the sealer across the boards, separating a floor that reflects light from one that reflects every mistake.
You will usually rotate between:
- A white pad to work the first coat into the grain.
- A maroon pad to scuff between coats.
- A wool pad to bring up the final sheen.
Floors that skip this stage carry brush marks and uneven patches. The buffer runs on its own momentum. Keep your weight off the handle and let the pad do its job.
Renting Specialised Attachments for Hard-to-Reach Areas
A rare few machines are powerful enough to handle a full room, yet nimble enough to slip under a radiator. Selecting the appropriate machinery for the job starts by surveying every square metre of the space, then asking which attachment will service each hard-to-reach gap.
Most wooden floor sander for hire packages include a standard drum machine and an edger, but the thresholds, under-cupboard gaps, and stair nosing require something smaller. For these pockets, rent a random orbital sander with a triangular head or a detail pad. These attachments pivot into spaces a full-size machine cannot enter.
Consider these trouble spots before signing the rental agreement:
- Cast iron radiator legs
- Door frames and sliding tracks
- Closet thresholds
A wooden floor sander for hire that offers these specialised extras saves hours of hand sanding. The right attachment lets you reach the last centimetre of every board without damaging the surrounding finish.
Understanding Hire Charges, Deposits, and Fine Print
Breaking Down Daily, Weekly, and Weekend Rental Rates
They will quote you a daily rate, a number that appears reasonable, until you consider the dust. That single day vanishes, swallowed by the grit and the roar of the machine. For a true restoration, a weekend rate offers a semblance of sanity. It provides the necessary time to complete the first cut, the second cut, and still have a moment to address the unexpected, like a hidden nail or a stubborn patch of old adhesive. The cost per hour diminishes, but the commitment grows.
Deposits hold a darker purpose. They are not merely a formality but a promise, a bond against the potential damage your inexperience might unleash upon their precious machinery. A careless slip can gouge a floor or dull a drum, and the fine print will remind you of this. Read the contract for details on sandpaper consumption; it is a consumable cost that creeps into your final bill.
– Always inspect the machine for pre-existing damage and document it.
– Clarify whether the deposit covers sandpaper and maintenance fees.
– Ask about the policy for breakdowns or mechanical failures.
Weekly rates, however, are the domain of the true devotee. This option transforms the undertaking into a full immersion. For a larger home, the weekly hire allows for a meticulous pace, and it removes the frantic pressure of the ticking clock. Just remember that the hire company’s insurance often hinges on the operator’s sobriety and competence. The fine print might also specify a penalty for using the wrong grit, a costly error that turns a simple rental into an expensive lesson. The terms are a labyrinth of clauses, and every signature brings you closer to the haunted beauty of a perfect, unblemished floor. The reward is the gleaming timber, bought with the currency of caution and a deep respect for the machinery on loan.
Budgeting for Consumables Such as Abrasives and Dust Bags
The advertised rate for a wooden floor sander for hire rarely reflects the true cost of the job. You are paying for the machine, yes, but also for the consumables that disappear with every pass. Abrasives wear down, dust bags fill up, and the fine print defines exactly who absorbs that expense.
Deposits sit at the centre of this arrangement. They protect the supplier from harm, but they also shift the burden onto you. A single mistake, a torn bag or a clogged belt, eats into your refund. Some contracts itemise these costs with brutal precision.
– Confirm whether the deposit covers normal wear on abrasive sheets.
– Ask if dust bags are supplied or charged separately.
– Request a written breakdown of any potential deductions.
The hire company’s terms control the outcome more than any skill you bring to the floor. A wooden floor sander for hire demands that you read every clause before you sign, not after the damage appears. Budget for the obvious, but respect the hidden charges.
Reviewing Security Deposit Requirements and Damage Policies
A security deposit does more than hold the machine; it holds liability. When you take a wooden floor sander for hire, the supplier’s damage policy defines the boundary between routine wear and chargeable harm. I photograph the unit before switching it on, because fine print rarely mentions pre existing scuffs.
Review every clause with the same care you give the timber. Some suppliers deduct for minor scuffing, while others flag only structural failure. Ask for a signed condition report. Confirm whether the deposit covers accessories like the edger or buffer. The refund depends on written terms, not the handshake.
- Cash or credit refund?
- Who inspects the return?
- Photograph cord and dust port.
Your accountability begins at the counter, not the first pass. A wooden floor sander for hire becomes your responsibility the moment keys change hands, and every clause you skip becomes a deduction you own.
Clarifying Whether You Need to Purchase Insurance
The hire charge for a wooden floor sander for hire rarely includes the kind of insurance that actually protects you. The fine print clarifies this quickly: the deposit covers damage, but insurance covers the chaos you cause. Some suppliers offer a damage waiver for a flat daily fee, which is essentially a bribe to stop sweating every time the cord catches. Others expect your own policy to step up. It won’t. Most household insurers laugh at rental tools. So ask point blank:
– Does the waiver cover the edger and buffer?
– Are operator errors classed as accidents or negligence?
– Can you buy cover after the machine is loaded?
I once paid extra because the waiver excluded “exuberant sanding.” Worth it. Your wallet and your nerves will align.
Calculating Whether Multiple-Day Hire Saves More Than One Day
Most people glance at the price tag for a wooden floor sander for hire and assume the daily rate tells the whole story. It doesn’t. The real math starts with the deposit, which often sits at a figure that makes you wince. Then there’s the fine print. One day might seem cheaper until you realise the minimum charge covers a full day, even if you finish by lunchtime. Multiple day hires usually drop the daily rate, but only if you actually need the extra time. Rushing creates mistakes and sometimes a second trip.
Consider what counts as a day in the agreement:
– Is it 8 hours or 24?
– Does the clock start when the machine leaves the store?
– Do weekends count as one day or two?
For a single room, a one day hire works. For larger areas, two days at a discounted rate often costs less than hauling the machine back and forth, especially when you factor in queue time at returns. Work out the total cost before you commit.
Preparing the Space Before the Hire Period Begins
Clearing the Room and Removing or Locking Down Fixed Furniture
Before the machine arrives, the room should feel hollow. Remove everything that can be carried, from rugs and cushion covers to the small treasures that gather on windowsills. Sweep the subfloor with a magnet to catch stray staples, nails, or screws, since a single metal shard can tear through a fresh sanding belt.
For furniture that cannot be moved, like built-in cupboards or heavy display units, unscrew the legs where possible, or wrap the pieces in thick plastic sheeting and seal the seams against the coming dust.
- Protect doorways with polyurethane sheeting
- Drape window frames, vents, and light fittings
- Cover curtain tracks and alarm sensors
When you finally collect your wooden floor sander for hire, the room should offer no resistance. Everything must sit still while the abrasive drum hums its low, patient song across the timber.
Repairing Loose Boards, Recessed Nails, and Surface Imperfections
One protruding nail can ruin a sanding belt in seconds. Before you collect your wooden floor sander for hire, walk the room barefoot. You will feel subtle deflections that your eyes skip. A loose board thuds under a tap.
Mark every suspect spot with chalk. Inspect each mark for:
- Loose nails that worked their way up
- Recessed nails that no longer grip
- Cracked or splintered tongues
- Warped sections that cup or twist
Drive each nail below the surface using a punch. Fill holes and gaps over three millimetres with a two-part epoxy compound. Let it cure completely! I have seen half-dry patches smear into the grain, costing an extra pass. Smooth proud joints with a hand plane. The goal is a flat, quiet surface. Then your hire period becomes pure sanding, not correction.
Sealing Doorways and Vents to Contain Airborne Dust
The average room can hold dust in suspension for hours after sanding stops. This is why the most crucial preparation happens before your wooden floor sander for hire even arrives at your property. You need to establish a sealed perimeter to keep that fine particulate matter from settling on curtains, carpets, and upholstery throughout the rest of your home.
Isolate the workspace completely using 0.15mm plastic sheeting and painter’s tape. You are not just blocking a doorway; you are creating an airlock. Seal off the room you are working in, and also cover any interior door gaps that lead to the main living areas. Air movement will find the smallest cracks, so be thorough.
Vents are a separate challenge. Heating ducts and air conditioning returns act like vacuum cleaners for dust. You must block these off or you will be cleaning your entire duct system for months.
– Turn off your HVAC system at the breaker before you begin.
– Cover each vent opening with plastic sheeting and secure the edges with tape.
– Place a second layer of sheeting over the first for added protection.
– Seal the gaps around the vent covers where they meet the floor or wall.
The goal is a controlled environment where the only thing moving is your sander. This preparation keeps the rest of your home clean and allows you to focus on the task at hand without worrying about collateral damage. A properly sealed space means the difference between a quick cleanup and a full household deep clean. It also protects the finish of your newly sanded floor from dust that might circulate back into the room.
Ensuring Access to an Adequate, Grounded Power Supply
A single tripped breaker can wipe out twenty minutes of your paid hire period. I always test the outlet before booking a wooden floor sander for hire. The machine draws substantial current, and a weak connection causes voltage drops that stall the drum mid cut. Confirm that your breaker is rated for 16 amps and that the socket is the three pin grounded type.
Use a heavy duty extension cord if the sander cannot reach. Unroll the cable completely; a coiled cord heats up. Position the connection away from dust collection bags.
My pre hire checklist:
- Confirm the socket is earthed
- Verify the breaker trips under load
- Measure the distance from the sander
- Keep a spare fuse
That preparation prevents a frustrating pause after you have paid for the first day.
Executing a Flawless Sanding Process From Start to Finish
Reading the Operational Guide and Performing a Test Run on Scrap
Before the drum ever touches a floorboard, the manual demands respect. I watched a contractor skip the test run once, and the result was a gouged living room that looked like a bear had fought the floor. The rental agent handed me the guide with a knowing nod, so I read it twice.
Here is the sequence that works every time:
– Adjust the tension lever to match the abrasive grit
– Lift the drum before starting the motor
– Lower the machine smoothly once it reaches full speed
Then I practise on three sheets of scrap pine. The wooden floor sander for hire hummed with a different rhythm on the offcuts, teaching me the exact pressure for each pass. That test run saved the boards, the deposit, and my sanity. When you finally hire a wooden floor sander for hire, spend those first ten minutes with the manual and scrap wood; it is the difference between a flawless finish and a costly surprise.
Vacuuming Loose Debris and Performing a Thorough Final Cleanup
The first full pass with a wooden floor sander for hire is where theory meets timber. I watched the machine settle into its rhythm, the drum kissing the boards with a sound like distant thunder. You feel the vibration through your boots, a constant reminder that this tool demands attention, not affection. The trick is to keep moving, never pausing, letting the abrasive do the work while your arms guide the direction. Overlap each pass by half the drum’s width to avoid streaks that haunt you later.
Once the coarse grit has done its job, the room transforms into a landscape of fine dust. This is where patience matters. The final sanding with finer grits reveals the true character of the wood, but only if you clean between each stage. A dirty floor will leave scratches that no amount of finishing oil can hide.
When the last pass is complete, the real work begins. The dust settles on every surface, a fine grey film that seems to cling to everything.
– Remove the dust bag from the wooden floor sander for hire and empty it outside
– Vacuum the entire floor surface twice, changing directions each time
– Wipe down all baseboards and corners with a tack cloth
– Let the room air out for at least an hour before any finish goes on
I remember the first job I did with a hire machine, thinking the vacuuming was optional. The stain revealed every missed spot. Now I treat the final cleanup with the same respect as the sanding itself. The silence after the machine is switched off tells you everything. If the air is clear and the boards feel smooth under bare feet, you have done it right. The wooden floor sander for hire goes back in its box, and the room waits for its new skin.
Creating a Grit Progression Plan From Coarse to Fine
The grit progression is the skeleton of a flawless sanding process. Start with a coarse abrasive, usually 36 or 40 grit, to strip old finish and level minor imperfections. Do not linger on one spot; the sander will gouge the timber. Move to 60 or 80 grit to erase the scratches from the previous pass. Then graduate to 100 or 120 grit for the final sweep. Here is a typical sequence I follow with a wooden floor sander for hire:
- 36 grit for heavy removal
- 60 grit for smoothing
- 80 grit for refining
- 120 grit for the final sheen
Each shift in grit requires a full cleaning of the floor. Residual dust from the coarser stage will contaminate the finer abrasives and score the boards. The right progression, executed without skipping steps, is what separates a professional result from a disappointing one.
Matching the Feed Rate and Pressure to the Machine Type
The moment you engage a wooden floor sander for hire, you match your body to the machine’s temperament. A drum sander wants a steady, even glide. Press too hard and the drum digs a trough. Pull too fast and swirls appear after the final coat. I ease off when the motor labours. A belt sander rewards a lighter touch and a consistent pace. Orbital machines tolerate pressure but demand patience.
The dust reveals mistakes. Crumbly dust means excessive force. A glazed abrasive means you are crawling. Overlap each pass by a third and lift the machine between passes.
- Walk at one metre per ten seconds for a drum sander.
- Keep the cord over your shoulder.
- Let the machine’s weight work, not your arms.
This rhythm turns sanding into a practised craft. The wooden floor sander for hire performs as well as its operator.
Staining, Sealing, and Coating the Timber After Sanding
The final coat never looks better than the sanding beneath it. Once the last grit has done its work, the surface is clean. Before any stain touches the boards, wipe away every trace of sanding dust with a tack cloth. Inspect the surface under raking light. Fix any remaining scratches now, because stain will emphasise them.
When the stain is even and fully dry, apply the first coat of sealer. Roll it thinly, then tip off with a brush. Sand between coats with a fine abrasive. This step matters.
The sequence that works:
- Check moisture content before sealing
- Apply sealer in sections, not one long sweep
- Buff between coats with a 220 grit screen
- Apply the top coat on a dry, dust free day
A wooden floor sander for hire can transform your boards, but I have learned that patience creates the final sheen.
Avoiding Costly Mistakes and Safety Pitfalls
Preventing Dips, Ridges, and Dwell Marks From Idling Machinery
When you collect a wooden floor sander for hire, note that a stationary drum causes damage. With full pressure, it eats a shallow crater into the timber, a dwell mark. This ridge ripples through every subsequent pass. I’ve learned to keep the sander moving as soon as the drum touches the wood. Idling is forbidden! A steady travel speed and overlapping passes by a third prevent dips. Common blunders include:
- Lowering the drum while stationary.
- Holding the sander in one spot to even a patch.
- Pausing to check your phone or dust bag.
Safety also means watching the power cord. A snagged cord yanks the sander sideways, leaving a curved gouge. The machine moves constantly.
Wearing Appropriate Respiratory Protection and Hearing Protection
Hiring a wooden floor sander for hire brings serious risks that many DIY enthusiasts overlook. The swirling dust cloud contains fine timber particles that reach deep into your lungs. A disposable mask simply cannot stop them. I always wear a properly fitted respirator with replaceable filters, even when the job feels quick. My eyes water just thinking about the grit I avoided.
Hearing damage is another concern. Operating a wooden floor sander for hire generates over 100 decibels of continuous noise, enough to permanently dull your hearing in a single afternoon. I use foam earplugs beneath earmuffs, because stacking protection feels safer than gambling with my ears. The noise also drowns out warning clicks from the machine, so protecting your hearing keeps you alert.
Smoothing the Floor Alongside the Grain vs. Against the Grain
Many people assume any sanding direction will work, but timber has a grain that dictates the entire process. Sanding against the grain with a wooden floor sander for hire leaves deep swirls that only appear after you apply the sealer. At that point, you face a costly resand or a marred floor.
The machine also reacts badly when you force it against the grain:
- Pulling sideways creates a violent tug that can jerk your wrists and strain your back.
- The drum digs deeper into softer grain lines, carving grooves that fill unevenly.
- Abrasives wear out fast, inflating your budget.
Whether you are sanding saligna, pine, or meranti, the grain runs long down every single plank and that direction is the only one that keeps each pass smooth and even.
Monitoring Extension Cords to Prevent Overheating and Tripping
An overheating extension cord can stop a sanding job without warning. When you hire a wooden floor sander for hire, the motor pulls serious current. A coiled cable traps heat, softening insulation and tripping breakers mid-pass. I have watched a rental sander shudder to a halt because the cord had grown warm and tight.
Tripping hazards remain a real danger. Running cable through a doorway or beneath a loose board causes a tug that can wrench the drum or throw your balance. Inspect every inch of cord for cuts and abrasions before each session.
- Uncoil the entire length before plugging in.
- Match the extension cable gauge to the sander ampere rating.
- Press a hand to the plug every twenty minutes.
That last habit costs nothing but saves a ruined floor or a twisted ankle.
Signs That the Job Exceeds Your Skill Level and Calling a Professional
The first pass tells the truth. No amount of visual inspection reveals what a spinning drum uncovers in seconds. You engage the motor on your wooden floor sander for hire, and the machine lurches over a soft section of board that should have been replaced years ago.
Certain warning signs demand that you stop and reassess before going further:
- Floorboards that flex or bounce under your weight before sanding begins
- Dark stains that reappear after the first cut, indicating trapped moisture
- A machine that chatters or vibrates unevenly across sections that look flat
These are not minor setbacks. A wooden floor sander for hire cannot correct structural weakness or hidden rot. Calling a professional at this stage protects your deposit, your safety, and the floor itself. The cost of a contractor’s assessment is small compared to replacing ruined boards or repairing a damaged rental machine.



0 Comments