Understanding the Core Differences
Defining the Composition of Floor Varnish
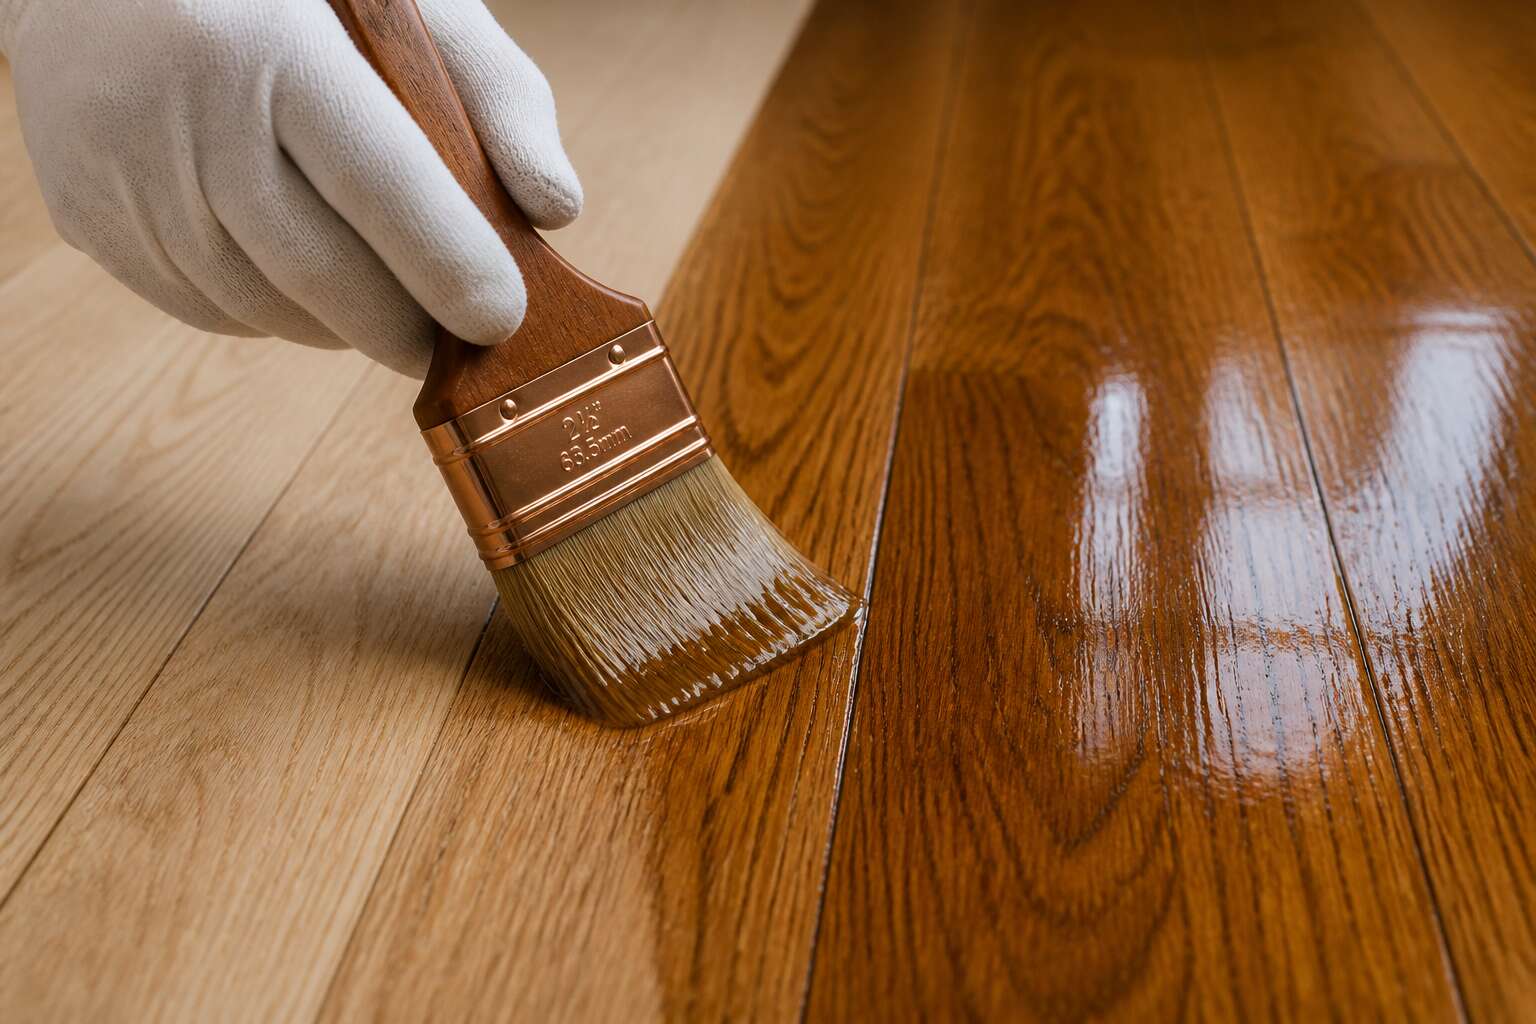
A single litre of floor varnish contains over 200 chemical compounds, and almost nobody reads the label! The composition of varnish is what sets it apart from oils. Varnish relies on a film-forming resin, usually polyurethane or alkyd, dissolved in solvents. Once applied, the solvent evaporates and the resin cures into a hard, continuous skin over the wood.
This skin is the essential difference. Oils penetrate the grain, while varnish creates a barrier. When I weigh the choice of wooden floor varnish or oil, I focus on that barrier because it determines durability, repairability, and shine.
- Resins give the film its strength and flexibility
- Solvents control how the varnish levels and dries
- Additives block UV rays or increase slip resistance
Each part has one job. A balanced formula makes the varnish predictable on any floor.
Defining the Composition of Hardwax Oil
Hardwax oil is a hybrid composition, not a film former. I see natural drying oils like linseed and tung, suspended with hard waxes such as carnauba. The oil penetrates the wood fibres, carrying the wax with it. Once cured, the oil solidifies inside the grain, while the wax remains at the surface to create a subtle sheen.
- drying oils that polymerise within the wood
- hard waxes that fill the pores and resist abrasion
- a minor solvent content to keep the mixture fluid
This structure makes repairs uncomplicated. When choosing wooden floor varnish or oil, consider that oil treatments need only a light sand and a fresh coat on the damaged spot. No removal of an entire layer is required.
Evaluating Durability and Long-Term Wear
Scratch and Abrasion Resistance Compared
Ever noticed how a floor remembers every dropped key and dragged chair? That first hairline scratch reveals more than your decor choices. Evaluating long-term wear of wooden floor varnish or oil demands looking beyond the finish’s initial gloss. Varnish, a thick polymer film, excels at resisting abrasion from constant footfall. Yet this same hardness becomes brittle under concentrated pressure, leading to chips that expose bare timber. Oil, by contrast, flexes with the wood fibres. It sacrifices the shining armour of a top coat for a matte surface that erodes slowly and evenly.
Several factors determine how each behaves over a decade:
– The mineral content of ground-in sand, which acts as a fine abrasive.
– The coefficient of friction from pets’ claws and moving furniture.
– The ambient humidity that causes wood to swell and contract daily.
Scratch resistance, I have learned, is a relative term! A varnished floor might repel light scuffs for years, only to crack dramatically in one corner. An oiled floor collects every scratch indiscriminately, but those same marks blend into the oak’s natural grain. The real difference with wooden floor varnish or oil emerges not in the first year, but the tenth.
Repairability: Spot Fixing vs. Full Recoating
The real distinction between wooden floor varnish or oil emerges when damage happens. A dropped wine bottle, a dragged sofa leg, a pet accident left too long. With varnish, the damage is localized but stubborn. You must sand the entire panel and hope the new coat blends with the old. Color shifts over years make invisible patches nearly impossible.
Oil offers a different story. The damaged area absorbs fresh oil and cures into the surrounding surface without a boundary line. I spot-repaired a 20-year-old oiled floor in an afternoon, and the repair vanished by evening.
Factors that influence repairability:
– Age of the original finish
– Sun exposure that alters pigment
– The timber species and its grain openness
Full recoating with varnish demands stripping everything back to bare wood. Oiled floors simply accept another layer. Choosing between wooden floor varnish or oil often comes down to whether you prefer permanent perfection or forgiving imperfection.
Reapplication Intervals and Floor Lifespan
A finish ages in two ways: it either wears thin with dignity or cracks through with drama. For South African homes, the durability question compares wooden floor varnish or oil on maintenance timelines, not just scratch resistance. Varnish might sit untouched for seven years before needing attention. Oil demands fresh coats every two years, but each application requires hours, not a week of sanding and dust.
The finish’s lifespan depends on failure mode, not the product label. Varnish fails from the top down, leaving entire rooms looking tired. Oil fails from the edge in, letting repairs stay local, and that matters! The deciding factors include:
– Traffic intensity, from bare feet to high heels
– Humidity swings between Highveld summers and winters
– The timber’s specific movement under temperature shifts
Reapplication intervals shape the real budget. Varnish offers a long delay followed by an expensive intervention. Oil offers regular, low-cost maintenance that never outlives its usefulness. The point where wooden floor varnish or oil crosses from aesthetic preference to financial decision is exactly at that first scratch.
Behavior in High-Traffic Areas
A hallway in Sandton carries more footfall in a week than a spare bedroom sees in a year. That distinction changes every assumption about durability. High-traffic areas expose how a finish handles cumulative stress, and the answer rarely matches the product brochure.
Oil finishes compress under foot traffic, developing a patina that holds scuffs within the grain. Varnish resists early damage, yet once broken, the wear spreads outward from the failure point.
- Entryways collect grit from outside
- Kitchen paths endure constant pivoting motion
- Stair treads absorb concentrated impact
Every zone tests wooden floor varnish or oil on its own terms. The varnish surface either holds its film or loses it in patches. The oil surface wears evenly, carrying daily marks while staying bonded to the timber.
Aesthetic, Texture, and Finish Options
Gloss Levels: High Shine vs. Matte and Satin
The play of light across a floor changes the entire mood of a room. When choosing a wooden floor varnish or oil, the visual weight and feel underfoot are just as important as durability.
I find varnish creates a taut, protective film that can feel almost glasslike. Oil penetrates the grain, leaving the wood’s natural topography exposed. This distinction shapes both appearance and touch.
- High shine: reflects light sharply, suited for formal interiors
- Matte: subdues reflections, emphasises grain depth
- Satin: a middle ground with gentle sheen
Matte surfaces hide minor scuffs while high gloss amplifies every footprint. Satin offers a tolerant balance. Your choice will alter how light interacts with the floor over time.
Enhancing Wood Grain and Natural Hue
The choice of wooden floor varnish or oil does more than shield the timber; it can either mute or magnify the grain. An oil finish sinks into the pores, saturating the fibres with a warm, honeyed cast. Varnish, by contrast, sits on the surface and can add a glassy depth, though it may flatten the tactile ridges that make oak or meranti feel distinctive under bare feet.
When I select a finish for a South African home, I consider how each option alters the natural hue. A clear varnish preserves the original colour but adds a slight amber tone. A hardwax oil darkens the wood more deeply, bringing out the figure and chatoyance. The texture also changes: oiled floors feel dry and silky, while varnished floors feel sealed and smooth.
- Raw oil: deepens grain, soft sheen
- White-washed oil: lightens hue, masks yellowing
- Thin-layer varnish: retains grain, low build
These choices let you tune the visual weight.
Sheen Uniformity and Lap Mark Risks
Getting an even sheen across a large room is a different challenge. The choice between wooden floor varnish or oil becomes obvious when you watch how each dries. Varnish forms a film that can show lap marks if you pause mid-stroke. Those lines appear where a partially dried edge meets fresh varnish, and they reflect light differently.
Oil finishes behave more forgivingly. Because they penetrate rather than build a film, they self-level with less visible banding. The texture shifts too. An oiled surface feels dry and silky. A varnished one feels sealed and inert.
- Varnish: high sheen uniformity when applied continuously, but lap marks appear with slow work
- Hardwax oil: lower gloss variation, easier to blend sections
For a DIY application, this matters. I have watched homeowners struggle with wet edges in a Johannesburg loft. A hired professional manages the full room; a homeowner alone often cannot, and the result shows in daylight.
Aged Patina and Sheen Evolution Over Time
Age changes how a floor looks. An oiled floor develops a patina that varnish cannot replicate. As the oil wears into the timber, the surface becomes softer and more textured. The sheen shifts gradually. A hardwax oil floor might start satin and mature into a mellow, low gloss finish with a lived-in quality. Varnish holds its original look longer. The film stays uniform until it degrades, then dulls unevenly or cracks.
The finish option you choose determines how the floor ages:
- Hardwax oil: the patina deepens over time, with wear patterns from foot traffic
- Varnish: the sheen stays consistent for years, then shows wear as a separate layer
The choice between wooden floor varnish or oil often comes down to how you want the floor to look in ten years. Homeowners in Cape Town often choose oil for the textured, tactile quality. A varnished surface feels sealed and slippery by comparison. The visual difference grows more obvious with each passing year.
Application Process, Tools, and Skill Required
Prep Work: Sanding Grits and Dust Control
Preparing a floor for a new finish requires a methodical sanding sequence. Start with a coarse 36 grit to strip old coatings, then move through 60 and 80 grits to refine the surface. Skipping grits leaves swirls that show through any finish.
Dust control is the critical factor. Use a vacuum attached to the sander and wipe with a tack cloth before applying anything. The choice between wooden floor varnish or oil changes your timing, but not the need for a clean base.
- 36 grit for rapid removal
- 60 grit for scratch elimination
- 100 grit for final smoothness
Skill matters more than tools. A random orbital sander is more forgiving, while a drum sander creates visible gouges if handled poorly. I have seen amateur attempts produce deep scratches that require filler. For wooden floor varnish or oil, fine sanding dust can mar the absorption, so extra care pays off.
Varnish Application: Brushes, Rollers, and T-Cut Methods
There is a moment after the final sanding pass when the room goes quiet and the dust settles. The air smells of raw timber and possibility. This is where the character of your floor is decided. The application of your chosen finish is not a passive act. It is a performance where timing and touch matter more than any brand name on a tin.
For varnish, the tool choice shapes the outcome as much as the product itself. A high quality synthetic brush holds a good amount of finish and lays it down evenly without losing bristles. Rollers speed up the process for large open areas, but they introduce micro bubbles into the coat. These bubbles pop as the varnish dries, leaving a texture like fine sandpaper if you do not manage them quickly. The T-cut method, which involves dragging a brush tip lightly through the wet varnish to break surface tension, remains the professional secret for a glass like result.
– Use a brush for edges and corners, working outward into the room.
– Use a roller for the main field, but follow immediately with a T-cut to release trapped air.
– Keep a wet edge at all times to prevent lap marks from forming between passes.
Skill is the invisible ingredient. A steady hand and a consistent pace prevent the varnish from pooling in low spots. Rushing to cover the whole floor in one session often causes the finish to pull or drag. For those weighing wooden floor varnish or oil, the varnish route rewards patience. Two thin coats always outperform one thick coat. The first coat seals the grain and raises the fibre. A light sanding between coats with 220 grit removes the fuzz and prepares a perfect key for the final layer. The real challenge is leaving the floor alone while it cures. Every footstep too early is a permanent ghost in the gloss.
Oil Application: Rags, Buffing, and Soaking Techniques
Oil application plays by different rules. Where varnish demands theatrical precision, oil rewards a more generous hand. You are essentially saturating the wood, letting it absorb what it needs. When weighing wooden floor varnish or oil, the application ritual itself often tips the scale.
The tools are humble. Rags, lint-free cloths, and buffing pads do the work. You pour, spread, and let the oil soak in. Then you wipe off the excess before it turns tacky. In my experience, the trick is knowing when the wood has had enough. Too little and the grain remains dry. Too much and you are left with a sticky mess.
The sequence matters:
- Apply a generous coat with a rag.
- Let it penetrate.
- Wipe off the excess before it gels.
- Buff to your desired sheen.
Buffing transforms the surface. Once the oil has penetrated, you buff the floor to a soft glow. This is not optional! It is the difference between a floor that shines and one that looks greasy. The same discipline applies whether you settle on wooden floor varnish or oil.
Curing Time and Dry-to-Touch Differences
A floor can feel dry to the touch and still be weeks away from full strength. That interval surprises many homeowners. When weighing wooden floor varnish or oil, curing time is the quiet difference nobody sees but everyone feels.
Varnish dries to the touch within hours. The surface hardens fast, yet full cure takes seven to fourteen days. Oil absorbs overnight and feels dry by morning, but polymerisation continues for up to three weeks. In the Highveld’s dry winter air, that process speeds up. Along the coast, humidity slows it down.
Here is what I have learned to respect:
- Dry-to-touch means nothing transfers to your hand.
- Cure time means the finish has reached its full structural integrity.
Patience during those weeks decides whether your wooden floor varnish or oil survives its first season!
Common Application Mistakes and How to Avoid Them
Applying any finish demands a steady hand and honest self assessment. The tools matter, but the person holding them matters more. A quality brush, a lambswool roller, or a lint free rag will not rescue a rushed job.
Most mistakes happen before the finish touches the wood. Uneven coats, overworking a section, or applying too thick top the list:
- Painting over dust or debris
- Stopping mid floor and letting a lap mark dry
- Using a soaked applicator that floods the grain
For wooden floor varnish or oil, the rule is simple: thin coats, consistent pressure, and no going back to fiddle. Wait for the right temperature. Move in straight lines. The skill is patience.
Costs, Maintenance, and Environmental Impact
Initial Material and Labor Cost Breakdown
The price of beauty is never plain. When choosing between wooden floor varnish or oil, the initial material and labor cost breakdown reveals hidden burdens. Varnish arrives cheaper per litre, but its application demands experienced hands and strict schedules. Oil costs more upfront, yet its labor is forgiving. I have watched budgets wither on forgotten details. Consider the true expenses:
- Surface preparation and sanding rates vary wildly across provinces.
- Varnish requires multiple coats and solvents for cleanup.
- Oil needs extra product for the first soak in.
Maintenance shifts the ledger. Varnish asks for full recoats when damaged. Oil allows spot repairs with minimal cost. Environmental impact weighs heavier on varnish, releasing volatile compounds. Oil, with natural resins, leaves a lighter shadow on the earth.
Cleaning Products: Specialized vs. Harsh Chemicals
Specialised cleaners for oiled floors cost more per litre, yet they preserve the wood and delay refinishing. Harsh chemical cleaners undercut that saving. They strip protective resins, forcing you to buy more product or pay for repairs. This trade off appears immediately in your monthly budget.
Maintenance differs. Oil floors accept gentle, pH neutral soaps. Varnish needs stronger solvents, but those solvents break down the finish over time. I have seen floors ruined by cheap bleach based solutions that promised a quick shine.
- Oil compatible cleaners use natural resins
- Varnish strippers often contain harsh solvents
Your choice between wooden floor varnish or oil decides your cleaning future. Specialised products leave a lighter environmental footprint, while harsh chemicals release volatile compounds with every scrub.
Hazardous VOCs and Solvent Content
Around 80% of the total cost of a wooden floor over its lifetime is spent on maintenance and repair, not the initial install. This figure often surprises homeowners who fixate on the upfront quote. The long term financial picture is where the decision between wooden floor varnish or oil truly takes shape.
Varnish creates a hard, continuous plastic film. When that film is breached, moisture creeps beneath it, causing white blisters that demand professional sanding. Oil penetrates the timber, flexing with seasonal movement. A simple reapplication of oil in a worn traffic lane costs a fraction of a full screen and recoat. Your monthly budget either absorbs small, predictable expenses or braces for sudden, significant overhauls.
Maintenance routines diverge sharply here. Oiled surfaces demand vigilance with pH neutral soaps, but they forgive neglect with a quick top up. Varnish resists stains brilliantly, yet once it dulls, no amount of buffing revives it. You must strip the entire surface.
The environmental ledger is equally clear. The solvent content in most varnishes is substantially higher:
– Varnish typically contains 40 to 60% volatile organic compounds (VOCs).
– Hardwax oil formulas often sit below 10% VOC content.
– Harsh chemical strippers used to remove varnish emit toluene and xylene.
These VOCs off gas into your living space during application and curing. In the warm South African climate, where windows often stay shut for air conditioning, those fumes linger. Oil products cure by oxidation, absorbing into the wood. They release a fraction of the airborne toxins, making them a safer choice for your family and the local air quality, especially when you consider that disposal of solvent laden rags and tins requires hazardous waste handling.
Formula, Coverage Rate, and Cost per Square Meter
Forty percent of a floor’s lifetime expense vanishes into repeated recoats and repairs. Most homeowners never tally this running total. The choice between wooden floor varnish or oil dictates whether that figure stays modest or balloons. Varnish demands professional stripping once its surface fails. Oil allows targeted spot treatments in worn zones. Your monthly budget either absorbs small, predictable expenses or braces for sudden, significant overhauls.
Maintenance routines diverge sharply here. Oiled surfaces demand vigilance with pH neutral soaps, but they forgive neglect with a quick top up. Varnish resists stains brilliantly, yet once it dulls, no amount of buffing revives it. You must strip the entire surface.
The environmental ledger is equally clear. The solvent content in most varnishes is substantially higher, with volatile organic compounds making up a large percentage of the formula. Compare the specifics:
- Varnish typically contains 40 to 60 percent volatile organic compounds.
- Hardwax oil formulas often sit below 10 percent.
- Harsh chemical strippers used to remove varnish emit toluene and xylene.
Coverage rates also tip the balance. A liter of varnish covers roughly 8 to 10 square meters per coat. Oil spreads further, often reaching 12 to 15 square meters. Cost per square meter for quality varnish sits around R80 to R120. Oil ranges from R60 to R90, though you need more coats initially. Over a decade, the reapplication costs for oil remain marginal compared to a varnish overhaul. That gap compounds in the warm South African climate, where windows often stay shut for air conditioning, trapping those fumes for weeks. Oil products cure by oxidation, absorbing into the wood. They release a fraction of the airborne toxins, making them the safer choice for your family and the local air quality.
Choosing the Right Option for Your Home
Matching Finish to Room Functionality
A floor in Johannesburg lives differently from one in Cape Town. Salt air, humidity, dust, and dry winters all change how timber behaves. That climate shapes whether you choose a wooden floor varnish or oil for each room.
Varnish sits on top of the timber. I have watched it handle years of abuse in busy family homes. It suits spaces where chairs scrape, pets skid, and children drop toys. Oil sinks into the wood. It suits quieter rooms where you want the grain visible and the surface warm underfoot.
There is no single wooden floor varnish or oil that works everywhere. The room’s function matters as much as the finish itself:
- Kitchens and bathrooms: varnish resists standing water
- Dining rooms: varnish handles cutlery drops and chair movement
- Bedrooms and studies: oil offers a natural matte feel without glare
Considerations for Underfloor Heating Systems
Underfloor heating transforms a timber floor into a thermal conductor, which alters the rules for choosing a wooden floor varnish or oil. The constant, gentle warmth does more than comfort bare feet; it accelerates the curing process and forces moisture out of the wood fibers at a steady rate. This persistent thermal cycling makes the elasticity of your finish critical. A brittle, film-forming varnish can develop hairline fractures as the boards expand and contract daily. Oil, which penetrates and flexes with the grain, generally copes better with this movement without showing stress marks.
The heat also affects how the finish ages. A varnish that yellows under UV light can darken faster when consistently warmed. Oil maintains a clearer appearance over time, although it may require more frequent attention in these conditions.
– Choose a varnish labelled specifically as flexible or suitable for heated floors to avoid cracking.
– Use a hardwax oil with a high natural oil content for better breathability.
– Monitor the surface temperature; most systems should not exceed 27°C to protect the finish.
The decision between a wooden floor varnish or oil for a heated subfloor also hinges on insulation. Oil allows the warmth to pass through more effectively, whereas a thick varnish layer can slightly insulate the surface, reducing the system’s efficiency. For those who prioritize the seamless heat transfer and a natural look, oil is often the superior technical choice. For a more robust, maintenance-free surface, a specifically engineered varnish will hold up, provided the system is run at a stable, moderate temperature to minimize thermal shock.
Compatibility with Timber Species
The timber’s anatomy dictates whether a wooden floor varnish or oil will last. Dense, closed-grain species like oak and maple have tight pores that hold varnish well. Open-grain woods such as meranti and teak harbor natural oils and resins that weaken adhesive bonds. I have seen varnish peel off kiaat within months, while oil penetrated the grain and aged without flaking.
South African floors often feature saligna, a eucalyptus hardwood with moderate pore structure. Saligna accepts both systems, but application temperature matters. In coastal humidity, varnish can blush. Oil remains forgiving.
- Closed grain: oak, maple, saligna
- Open grain: meranti, teak, kiaat
- Oily extractives: iroko, rosewood
Pine, a softwood, behaves differently. Low density means it absorbs oil quickly, so you need extra coats to achieve uniform sheen. Yet varnish sits as a rigid layer over a flexing surface, raising the risk of cracking. Match the finish to the species’ porosity.
Blended and Hybrid Solutions
Choosing a floor finish for your home rarely follows a perfect formula. The right wooden floor varnish or oil depends on the light in each room, the children, the pets, and even the way you host guests. I have watched homeowners choose a matte oil, then struggle with its upkeep.
Blended and hybrid solutions offer a middle route. They combine a thin resin film with penetrating oils, so the surface resists spills and still allows the timber to expand and contract naturally.
In a South African home, the choice often comes down to tolerance for routine. A varnish requires little attention until it fails, while an oil needs regular reapplication. Hybrids are a middle option, and they suit families who want both.
Restoring Old Floors: Which Product Resurfaces Better
An old floor demands an honest answer. When the finish is cracked and the grain shows every scratch, choosing a wooden floor varnish or oil is not about preference. It is about what the surface can still tolerate. Varnish builds a hard shell that covers scars. Oil feeds the fibres and leaves the history exposed.
Inspect the floor before you commit. Deep gouges call for varnish’s protective film. Water stains and old wax respond better to oil, which bonds to raw timber without leaving patches.
- Run a coin across the boards.
- Check for spots that repel water.
- Look at the end grain for dryness.
These signals reveal which product will stick and which will slip off. Resurfacing an old floor is a test, but the right wooden floor varnish or oil improves your chances.



0 Comments